Foods That Cause Wrinkles: The Hidden Enemies of Youthful Skin

Foods That Cause Wrinkles: The Hidden Enemies of Youthful Skin 😨

You might be spending hundreds of dollars on anti-aging creams, serums, and facials, but if your diet is full of skin-damaging foods, you’re fighting a losing battle. Wrinkles don’t just appear because of aging; they are accelerated by what you eat.

Certain foods speed up collagen breakdown, trigger inflammation, and rob your skin of its natural elasticity. If you want to age gracefully and keep your skin firm, smooth, and radiant, it’s time to identify and eliminate these wrinkle-causing culprits. These tips will help you to avoid Foods That Cause Wrinkles.

Let’s expose the foods that are secretly aging your skin faster than time itself.

  1. Sugar: The #1 Skin Destroyer You Can’t Ignore

If you’re serious about preventing wrinkles, sugar needs to go. Excess sugar leads to glycation, a process where sugar molecules attach to collagen and elastin, making them stiff, weak, and prone to breakdown. This results in sagging skin, fine lines, and premature wrinkles.

🔹 Where sugar hides:
❌ Soft drinks, packaged fruit juices
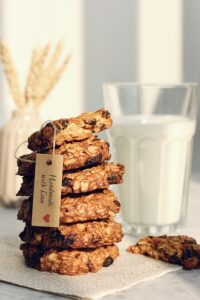
❌ Pastries, cakes, cookies
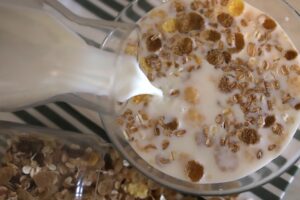
❌ Breakfast cereals, flavored yogurts
❌ Candy bars and even some “healthy” granola bars

🔥 Pro Tip:

If you crave sweets, switch to natural sources like fruits, dark chocolate (85% or more), or raw honey. They satisfy your sweet tooth without wrecking your collagen.

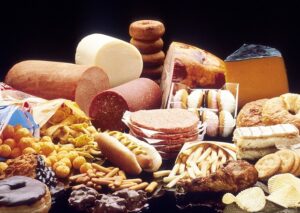
  1. Processed Meats: Wrinkle-Causing Preservatives in Every Bite

Bacon, sausages, hot dogs, and deli meats may be convenient, but they are loaded with preservatives like nitrates and sulfites. These chemicals trigger inflammation, break down collagen, and dry out your skin—making wrinkles appear faster.

🔹 Why processed meats are bad for your skin:
❌ High sodium content dehydrates skin, causing dullness and sagging.
❌ Preservatives weaken collagen, making skin prone to fine lines.
❌ Advanced Glycation End Products (AGEs) speed up skin aging.

🔥 Pro Tip:

If you love meat, opt for fresh, organic, or grass-fed options. Better yet, add lean proteins like wild-caught fish or plant-based alternatives that nourish your skin.

  1. Alcohol: Dehydrates and Weakens Skin

A few drinks now and then won’t hurt, but frequent alcohol consumption is a direct invitation to wrinkles. Alcohol dehydrates your skin, making it look dull, flaky, and wrinkled. Plus, it depletes Vitamin A, which is crucial for skin renewal.

🔹 Worst alcoholic choices for skin:
❌ Cocktails with sugary mixers (double the damage)
❌ Beer (high in carbs, which turn into sugar)
❌ Excessive wine (even red wine can dehydrate the skin over time)

🔥 Pro Tip:

If you drink, balance it out by hydrating properly. For every glass of alcohol, drink an equal amount of water to minimize dehydration effects.

  1. Deep-Fried Foods: The Wrinkle-Accelerating Bomb

French fries, fried chicken, and onion rings might taste amazing, but they are your skin’s worst nightmare. These foods are soaked in oxidized oils, which cause inflammation and destroy skin elasticity.

🔹 How fried foods age your skin:
❌ Cause oxidative stress, breaking down collagen.
❌ Lead to chronic inflammation, which speeds up skin aging.
❌ Clog pores, making skin look rough and uneven.

🔥 Pro Tip:

Foods That Cause Wrinkles: Switch to air-fried, grilled, or baked versions of your favorite foods. Use healthy fats like avocado oil or extra virgin olive oil instead of processed vegetable oils.

  1. White Bread & Refined Carbs: The Silent Skin Agers

White bread, pasta, and pastries might be a staple in your diet, but they’re making your skin age faster than you realize. These high-glycemic foods quickly turn into sugar, triggering glycation and destroying collagen.

🔹 Common wrinkle-inducing refined carbs:
❌ White bread, white rice, white pasta
❌ Muffins, bagels, pancakes
❌ Instant noodles, chips, and crackers

🔥 Pro Tip:

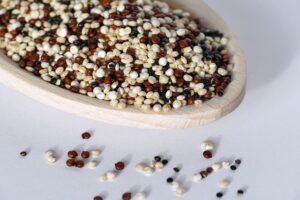
Replace refined carbs with whole grains like quinoa, brown rice, and sprouted grain bread. They stabilize blood sugar levels and protect collagen from damage.

  1. Dairy: Friend or Foe for Your Skin?

For some people, dairy accelerates skin aging by triggering inflammation and breakouts. The hormones in dairy products can cause skin irritation, making fine lines and wrinkles more pronounced.

🔹 Worst dairy offenders:
❌ Whole milk and flavored yogurts
❌ Processed cheese (American cheese, cream cheese)
❌ Ice cream and dairy-based desserts

🔥 Pro Tip:

Foods That Cause Wrinkles: Try plant-based milk alternatives like almond, coconut, or oat milk. If you love dairy, stick to organic, grass-fed options that have fewer hormones and additives.

  1. Margarine & Hydrogenated Oils: The Skin’s Worst Enemy

If you still use margarine instead of butter, it’s time to stop. Margarine is full of trans fats, which trigger inflammation, weaken skin cells, and cause premature aging.

🔹 Where trans fats hide:
❌ Margarine and vegetable shortening
❌ Processed baked goods (cookies, pastries)
❌ Microwave popcorn, frozen pizzas

🔥 Pro Tip:

Use grass-fed butter, coconut oil, or extra virgin olive oil instead. These fats support skin hydration and protect against wrinkles.

Final Thought: Eat Smart, Stay Young

Wrinkles are not just about aging—they’re about lifestyle choices. The food you eat either supports your skin or destroys it. If you want to maintain youthful, glowing skin, it’s time to cut out wrinkle-causing foods and replace them with skin-nourishing alternatives. So try to avoid Foods That Cause Wrinkles.

🚀 Quick Recap: Foods That Speed Up Wrinkles

Sugar – Destroys collagen
Processed meats – Cause inflammation
Alcohol – Dehydrates and dulls skin
Fried foods – Break down elasticity
Refined carbs – Turn into sugar, weaken collagen
Dairy – Triggers breakouts and irritation
Margarine & trans fats – Increase skin aging

✅ Eat These Instead for Ageless Skin

✔ Berries (antioxidants protect collagen)
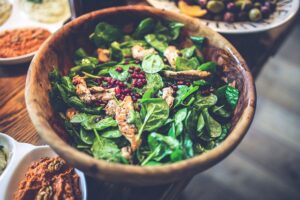
✔ Leafy greens (reduce inflammation)
✔ Nuts & seeds (healthy fats boost hydration)
✔ Omega-3-rich fish (salmon, mackerel)
✔ Green tea (fights free radicals)

The power to slow down aging is in your hands—or rather, on your plate. Make the switch today, and your future self will thank you with wrinkle-free, radiant skin!

Is Ghibli Images Safe? What You Need to Know Before Using Them

Is Ghibli Images Safe? What You Need to Know Before Using Them 🔥

Studio Ghibli’s breathtaking animation has captured the hearts of millions worldwide. From the magical worlds of My Neighbor Totoro to the stunning landscapes of Spirited Away, Ghibli’s artistry is legendary. But as these beautiful images circulate across the internet, a pressing question arises:

Are Ghibli images safe to use? Can you download, share, or even modify them without legal or security risks?

If you think it’s just about aesthetics, think again. The use of Ghibli images can be a legal and cybersecurity minefield, depending on how and where you obtain them. This article breaks down the risks, the legal aspects, and the best ways to use Ghibli images safely.

  1. Understanding Copyright: Are Ghibli Images Free to Use?

Before you download or share a Ghibli image, know this—Studio Ghibli holds strict copyright over its work. Unlike stock images or royalty-free content, Ghibli images are not automatically available for public use.

🔹 What does this mean?
❌ You cannot use Ghibli images for commercial purposes (merchandise, advertisements, branding).
❌ You cannot modify or edit Ghibli images and claim them as your own.
❌ You cannot redistribute them on websites as downloadable content without permission.

✅ However, some exceptions exist:
✔ Using Ghibli images for personal wallpapers or private use is generally safe.
✔ Certain Ghibli images have been officially released by the studio for free use.
✔ If an image falls under fair use (for educational or critique purposes), it might be allowed.

🔥 Pro Tip: If you want to use Ghibli images legally, check Studio Ghibli’s official website for guidelines on fan use.

  1. The Hidden Cybersecurity Risks of Downloading Ghibli Images

Is Ghibli Images Safe?: Let’s talk about something most people ignore—security risks. The internet is flooded with websites claiming to offer free Ghibli images, but many of them come with hidden dangers.

🔹 Risks of downloading Ghibli images from unreliable sources:
Malware & Viruses – Many “free” image download sites inject malicious software into files.
Phishing Scams – Fake websites may trick you into providing personal details before downloading.
Copyright Traps – Some websites offer pirated content disguised as “free,” putting you at risk of legal action.

How to Download Ghibli Images Safely:

Use official sources (Studio Ghibli’s website, licensed partners, or authorized distributors).
Check file formats—legit image files should not have .exe or .zip extensions.
Scan files before opening—use antivirus software to detect hidden threats.

🔥 Pro Tip: Avoid downloading images from unknown forums, torrents, or “free wallpaper” sites. Stick to trusted platforms.

  1. Can You Use Ghibli Images for Social Media and Blogs?

Is Ghibli Images Safe?: Many fans love sharing Ghibli-themed content on social media, but is it legally safe? The answer depends on how you use the images.

🔹 Safe ways to use Ghibli images on social media:
✔ Sharing images from official Ghibli accounts (Twitter, Instagram, Facebook).
✔ Using Ghibli GIF s and stickers provided by the studio.
✔ Posting fan art inspired by Ghibli (as long as it’s original and not traced).

🔹 Risky ways to use Ghibli images:
❌ Uploading Ghibli images without crediting the source.
❌ Using them for personal branding or promotion.
❌ Selling or distributing Ghibli images as NFT artwork.

🔥 Pro Tip: If you post Ghibli images, always credit the studio and avoid commercial use.

  1. Is It Safe to Print Ghibli Images for Personal Use?

You love Ghibli, and you want a framed image of Howl’s Moving Castle on your wall. Is it okay to print it?

✅ Yes, if it’s for personal, non-commercial use.
❌ No, if you plan to sell, distribute, or mass-produce prints.

Many online stores sell unlicensed Ghibli posters, T-shirts, and accessories—but these are copyright violations. Studio Ghibli has a zero-tolerance policy on unauthorized merchandise, so purchasing from unofficial sellers can support illegal businesses.

🔥 Pro Tip: If you want a legal Ghibli print, buy from official sources like Studio Ghibli stores, licensed retailers, or authorized art galleries.

  1. The Best Alternatives: Where to Find Legal Ghibli Images

If you want Ghibli-like aesthetics without legal risks, here are some great alternatives:

🔹 Official Ghibli Wallpapers – Studio Ghibli has released a selection of free wallpapers for fans.
🔹 Ghibli Art Books – Officially published books contain high-quality illustrations and are copyright-safe.
🔹 Creative Commons Anime Art – Some artists create Ghibli-inspired content under free-use licenses.

🔥 Pro Tip: Search for “Studio Ghibli official wallpapers” on their website to find authorized images.

Final Verdict: Are Ghibli Images Safe?

Is Ghibli Images Safe?: Yes, if you use them wisely. But blindly downloading and sharing Ghibli images can lead to legal issues and cybersecurity risks.

🚨 Key Takeaways

Personal use is safe (wallpapers, private printing).
Commercial use is risky (selling, branding, advertising).
Downloading from unknown sources is dangerous (viruses, malware).
Social media sharing is acceptable (with proper credit).
Always check for official permissions before using Ghibli images publicly.

Is Ghibli Images Safe? Studio Ghibli’s artistry is worth admiring, but respecting copyright laws and security measures is just as important. Use Ghibli images responsibly, and you’ll enjoy their magic without any trouble!

You may also like to read…

Daily Tooth Care: The Ultimate Guide to a Strong, Healthy Smile

Daily Tooth Care: The Ultimate Guide to a Strong, Healthy Smile 😁

Your teeth are more than just tools for chewing—they define your smile, boost your confidence, and play a critical role in your overall health. But let’s be honest: most people only think about their teeth when they start hurting. That’s a mistake.

Daily tooth care isn’t just about avoiding cavities—it’s about keeping your mouth in peak condition for life. A weak, neglected dental routine can lead to tooth decay, gum disease, and even systemic health issues like heart disease. So if you’ve been taking your oral hygiene lightly, it’s time to upgrade your daily habits.

Let’s dive into the right way to care for your teeth every single day.

  1. Start Your Day Right: The First 5 Minutes Matter

Daily Tooth Care: Most people stumble out of bed, grab their toothbrush, and give their teeth a lazy scrub. That’s not enough. Your mouth is full of bacteria when you wake up, and if you don’t clean properly, you’re allowing germs to thrive.

🔹 What to do?
✅ Brush before breakfast—eating first can spread bacteria and acid.
✅ Use fluoride toothpaste to strengthen enamel.
✅ Spend at least 2 minutes brushing—most people barely last 30 seconds.

🔥 Pro Tip:

Don’t rinse your mouth immediately after brushing! Fluoride needs time to work, so let it sit for at least 30 minutes before drinking water or eating.

  1. Floss Like You Mean It: The Step Most People Skip

Flossing isn’t optional—it’s non-negotiable. Brushing alone only cleans 60% of your teeth. The remaining 40% is between your teeth, where plaque and food particles build up, causing decay and gum disease.

🔹 How to floss the right way?
✅ Use gentle movements—don’t snap the floss down, as it can harm your gums.
✅ Curve the floss around each tooth and go beneath the gumline.
✅ Floss before brushing to remove hidden debris first.

🔥 Pro Tip:

Hate flossing? Try water flossers—they’re just as effective and easier to use!

  1. Choose Your Toothpaste Wisely: Not All Are Equal

Walk into any store, and you’ll see dozens of toothpaste brands claiming to do everything from whitening your teeth to curing sensitivity. But not all toothpaste is good for your teeth.

🔹 What to look for?
Fluoride: Essential for strengthening enamel and preventing decay.
Low Abrasiveness: Avoid toothpaste with harsh ingredients that wear down enamel.
Tartar Control: Helps prevent plaque from hardening into damaging tartar.

🔥 Pro Tip:

If you have sensitive teeth, avoid whitening toothpaste with strong bleaching agents—it can worsen sensitivity over time.

  1. Watch What You Eat: Your Teeth Feel It Too

What you eat directly affects your dental health. Sugary foods and acidic drinks attack your enamel, while nutrient-rich foods strengthen your teeth from the inside out.

🔹 Best foods for strong teeth:
Dairy products (cheese, yogurt) – High in calcium and phosphorus.
Crunchy vegetables (carrots, celery) – Naturally clean your teeth.
Leafy greens (spinach, kale) – Boost gum health with vitamins and minerals.

🔹 Worst foods for your teeth:
❌ Sugary sodas and fruit juices – Acidic and loaded with sugar.
❌ Sticky candies – Hard to remove, leading to cavities.
❌ Excessive coffee and tea – Stains teeth and weakens enamel.

🔥 Pro Tip:

Chewing sugar-free gum after meals helps stimulate saliva, which naturally cleans your teeth!

  1. Nighttime Routine: Don’t Go to Bed with a Dirty Mouth

Daily Tooth Care: Your nighttime dental routine is just as important as your morning one. Throughout the day, bacteria, food particles, and plaque build up in your mouth. If you don’t clean them properly before bed, they get hours to attack your teeth while you sleep.

🔹 Essential steps before bed:
✅ Brush for 2 full minutes—don’t rush it!
✅ Floss every single night—this is when plaque builds up the most.
✅ Use an alcohol-free mouthwash to kill bacteria and freshen breath.

🔥 Pro Tip:

Sleeping with your mouth open? This dries out your saliva, making you more prone to cavities. Try using a humidifier or nasal strips if you have trouble breathing through your nose.

  1. Your Tongue Matters Too: Don’t Ignore It

Your tongue is a bacteria magnet. If you don’t clean it, all those bacteria just sit there, causing bad breath and increasing the risk of oral infections.

🔹 Best way to clean your tongue?
✅ Use a tongue scraper for a deeper clean.
✅ If using a toothbrush, brush gently to avoid damage.

🔥 Pro Tip:

If you constantly have bad breath, your tongue might be the culprit. Cleaning it daily can instantly improve your breath!

  1. Don’t Skip the Dentist: Prevention is Easier Than Treatment

No matter how perfect your Daily Tooth Care is, you still need professional cleanings and check-ups. A dentist can catch problems before they turn into painful, expensive issues.

🔹 How often should you visit?
✅ Every 6 months for a cleaning and check-up.
✅ If you have a history of gum disease, consider every 3–4 months.

🔥 Pro Tip:

If you tend to avoid the dentist due to fear or discomfort, look for a clinic specializing in gentle, anxiety-free dentistry. Modern techniques have made dental visits much easier!

Final Thoughts: Your Teeth Deserve Better

Brushing twice a day isn’t enough—you need a complete routine to keep your teeth healthy, strong, and free from decay. The good news? These simple habits don’t take much time, but they make a huge difference in your dental health.

🔹 Ready to upgrade your daily tooth care? Start with these steps today, and your smile will thank you for years to come!

How to Control Mood Swings: Master Your Emotions Like a Pro

Hand holding a sad face card hiding behind a happy smiling face. Bipolar and depression concept, mental health concept, personality, mood swings

How to Control Mood Swings: Master Your Emotions Like a Pro

Mood swings are more than just passing emotions—they can hijack your day, affect your relationships, and make you feel completely out of control. One moment you’re on top of the world, and the next, you’re drowning in irritation, sadness, or frustration. But here’s the truth: You are NOT a slave to your emotions.

If you want to take charge of your mood swings and create emotional stability, you need to understand what’s causing them and use the right strategies to regulate your mind and body. This isn’t about suppressing your emotions—it’s about mastering them.

  1. Identify Your Triggers: Know What Sets You Off

How to Control Mood Swings: Mood swings don’t just happen out of nowhere. There’s always a trigger—you just need to find it.

🔹 Common triggers include:
  • Hormonal changes (menstrual cycle, menopause, or thyroid imbalances)
  • Lack of sleep
  • Unhealthy diet (too much sugar, caffeine, or processed foods)
  • Stress or burnout
  • Emotional baggage from unresolved issues
  • Too much social media exposure
🔥 Action Plan:
  • Start tracking your mood shifts. Use a journal or an app to note what you were doing, eating, or thinking before a mood swing hit.
  • Identify patterns. Are you always irritable after skipping meals? Do certain people drain your energy? Find the connection and tackle it head-on.
  1. Balance Your Blood Sugar: Stop the Energy Crashes

One of the biggest hidden causes of mood swings is blood sugar fluctuations. When you eat too much sugar or processed food, your body experiences a roller coaster of energy spikes and crashes—leading to irritability, fatigue, and anxiety.

🔹 What to do?
✅ Start your day with protein-rich foods (eggs, nuts, Greek yogurt).
✅ Cut back on refined sugar and replace it with natural alternatives like honey or fruits.
✅ Eat smaller, balanced meals every 3–4 hours to prevent energy dips.

  1. Move Your Body: Use Exercise as Your Reset Button

Physical movement is one of the fastest ways to regulate your mood. Exercise releases endorphins—your brain’s natural mood boosters—while reducing stress hormones like cortisol.

🔹 Best mood-stabilizing exercises:
🏃‍♂️ Cardio (running, dancing, cycling) – Burns off stress and boosts energy.
🧘‍♀️ Yoga & deep breathing – Balances hormones and calms the mind.
🏋️‍♂️ Strength training – Builds resilience, both mentally and physically.
🔥 Action Plan:
  • Don’t wait for motivation—schedule exercise into your day like an important meeting.
  • Even 10 minutes of movement can make a difference. Take a brisk walk when you feel your mood shifting.
  1. Master Your Mindset: Shift Negative Thought Patterns

How to Control Mood Swings: Your thoughts create your emotions. If you’re constantly feeding your mind with negativity, self-doubt, or fear, your mood swings will worsen. The trick is to become aware of your inner dialogue and change it before it spirals out of control.

🔹 Steps to shift your mindset:
Catch negative thoughts. When you feel a mood drop, ask yourself: What am I thinking right now?
Challenge the thought. Is it based on facts, or is your mind exaggerating?
Replace it with logic. Instead of “Nothing ever goes right for me,” say, “This is just a bad moment, not a bad life.”
🔥 Pro Tip:

How to Control Mood Swings: Use affirmations daily. Instead of saying “I’m so moody,” try “I am in control of my emotions.” Repeat it enough, and your brain will start believing it.

  1. Fix Your Sleep: Recharge Your Emotional Battery

Lack of sleep is like pouring gasoline on mood swings. Your brain needs rest to regulate emotions, and when you don’t get enough, you’re more likely to snap at people, feel anxious, or get easily overwhelmed.

🔹 Better sleep habits to stabilize moods:
✅ Stick to a sleep schedule (even on weekends).
✅ Avoid screens 1 hour before bedtime—blue light messes with melatonin.
✅ Try magnesium or herbal teas to relax your nervous system.
  1. Reduce Stress: Cut Out the Emotional Chaos

Stress is one of the biggest mood disruptors. If your life feels like a constant rush of deadlines, drama, and obligations, your emotions will always be on edge. It’s time to declutter your mind and set boundaries.

🔹 Quick stress-busting techniques:
Say NO more often. Don’t take on things that drain you emotionally.
Practice mindfulness. Spend 5 minutes focusing on your breath—it resets your nervous system.
Disconnect from toxic environments. Unfollow negativity on social media and avoid gossip circles.
  1. Get Support: Don’t Do It Alone

Mood swings can feel isolating, but you’re not alone. If you’re struggling to manage your emotions, seek support from someone you trust—whether it’s a close friend, therapist, or mentor. Talking things out helps process emotions and gain perspective.

🔥 Final Thought: Take Control Today!

How to Control Mood Swings: Mood swings don’t have to rule your life. By making intentional changes in your habits, diet, sleep, and mindset, you can create lasting emotional stability. Start today with one small step—whether it’s journaling, eating a balanced meal, or moving your body. You have the power to control your emotions, not the other way around.

🚀 Ready to take charge? Try these steps, track your progress, and watch how your mood transforms!

5 Powerful Foods to Reduce Cholesterol and Protect Your Heart

5 Powerful Foods to Reduce Cholesterol and Protect Your Heart

High cholesterol is a silent killer, slowly clogging your arteries and increasing your risk of heart disease. While medications can help, the real game-changer is your diet. If you’re serious about lowering your cholesterol naturally, it’s time to rethink your plate with these 5 Powerful Foods to Reduce Cholesterol. Here are five powerful foods that actively work to reduce cholesterol and keep your heart in peak condition.

  1. Avocados – The Heart’s Best Friend

Avocados aren’t just trendy; they’re a cholesterol-lowering powerhouse. Packed with monounsaturated fats, these creamy fruits help boost good HDL cholesterol while slashing bad LDL cholesterol. But the real magic? Avocados are loaded with beta-sitosterol, a plant-based compound that blocks cholesterol absorption in the intestines.

🔹 How to Add It to Your Diet:
  • Smash it on whole-grain toast with a sprinkle of flax seeds.
  • Toss it into salads for a creamy, heart-friendly boost.
  • Blend it into smoothies for a rich, nutrient-packed drink.
  1. Oats – The Fiber Shield Against Bad Cholesterol

If you’re not starting your day with oats, you’re missing out on one of the most effective cholesterol fighters. Oats contain beta-glucan, a type of soluble fiber that acts like a sponge, trapping cholesterol and flushing it out of your system before it enters your bloodstream.

🔹 How to Add It to Your Diet:
  • Enjoy a warm bowl of oatmeal topped with berries and nuts.
  • Use oat flour in baking for a cholesterol-friendly alternative.
  • Blend oats into smoothies for an extra fiber punch.
  1. Fatty Fish – The Omega-3 Powerhouse

Salmon, mackerel, and sardines are your ultimate cholesterol-fighting allies. Packed with omega-3 fatty acids, these fish lower triglycerides, reduce inflammation, and prevent the buildup of plaque in your arteries. Unlike red meat, which is high in saturated fats, fatty fish helps improve heart health without spiking cholesterol levels.

🔹 How to Add It to Your Diet:
  • Grill or bake salmon with herbs for a delicious, heart-healthy meal.
  • Swap out processed meats for a tuna or sardine sandwich.
  • Incorporate fish into soups and salads for added nutrition.
  1. Nuts – Small but Mighty Cholesterol Fighters

A handful of nuts a day can work wonders for your cholesterol levels. Almonds, walnuts, and pistachios are rich in healthy fats, fiber, and plant sterols—natural compounds that prevent cholesterol absorption. The combination of these 5 Powerful Foods to Reduce Cholesterol & nutrients helps lower bad LDL cholesterol while maintaining healthy levels of good HDL cholesterol.

🔹 How to Add It to Your Diet:
  • Snack on a mix of raw, unsalted nuts instead of chips.
  • Sprinkle crushed almonds over yogurt or oatmeal.
  • Blend walnuts into a homemade pesto for a nutrient-rich sauce.
  1. Garlic – Nature’s Cholesterol Buster

Garlic isn’t just a flavor booster—it’s a natural remedy for high cholesterol. This potent super food contains allicin, a compound known to lower cholesterol levels and keep arteries flexible, reducing the risk of heart disease. Regular garlic consumption has been linked to lower total cholesterol and improved circulation. So give a try to these 5 Powerful Foods to Reduce Cholesterol.

🔹 How to Add It to Your Diet:
  • Crush fresh garlic into salad dressings and dips.
  • Sauté garlic with vegetables for a delicious and healthy side dish.
  • Roast whole garlic bulbs and spread the soft cloves on whole-grain bread.

Final Thoughts: Take Charge of Your Heart Health

Lowering cholesterol isn’t about deprivation—it’s about smart choices. By incorporating these five powerful foods into your daily routine, you can naturally lower bad cholesterol, boost heart health, and reduce your risk of cardiovascular disease. Start today—your heart will thank you!

🔹 Pro Tip: Pair these foods with regular exercise and avoid processed junk to maximize your results. Want to see the difference? Track your cholesterol levels before and after making these dietary changes—you’ll be amazed at the transformation by these 5 Powerful Foods to Reduce Cholesterol!

Hibiscus for Long Hair: The Ancient Indian Remedy

Hibiscus for Long Hair: The Ancient Indian Remedy🌺😊

Long, shiny hair has always been a cherished beauty standard in India, a sign of health, vitality, and elegance. While modern-day hair care routines are brimming with chemical-laden products, the true secret to achieving gorgeous, long hair lies in the wisdom of ancient Indian remedies. One of the most powerful and time-tested ingredients? The humble Hibiscus flower.

But why is hibiscus revered as a magical hair potion? Let’s dive into the rich heritage of hibiscus as a natural hair elixir and discover how you can harness its power for beautiful, resilient hair.

Why Hibiscus is the Ultimate Hair Growth Booster

The beauty of Hibiscus for Long Hair is not just in its vivid, captivating petals. Its real power lies in the wealth of hair-nourishing nutrients it offers. For generations, Ayurveda has embraced hibiscus as a primary ingredient to promote hair growth, thickness, and overall health.

Nutrient Powerhouse

Hibiscus is rich in:

  • Amino Acids: Essential for building keratin, the protein that strengthens hair.
  • Vitamin C: Boosts collagen production, crucial for hair growth.
  • Antioxidants: Combat scalp damage and reduce hair thinning.
  • Flavonoids & Mucilage: Provide deep conditioning, leaving hair soft and manageable.

The combination of these nutrients makes hibiscus a holistic solution for tackling hair fall, split ends, dandruff, and dullness.

Hibiscus Benefits for Hair Growth
  1. Promotes Faster Hair Growth

Hibiscus for Long Hair acts as a natural stimulant that awakens dormant hair follicles, encouraging them to produce new strands. The presence of amino acids helps improve the structural integrity of hair, making it thicker and stronger.

  1. Reduces Hair Fall

If you’re tired of hair fall every time you brush your hair, hibiscus is your savior. Its vitamin-rich composition strengthens the roots, reducing hair breakage and minimizing hair fall.

  1. Prevents Premature Graying

Indian households have long relied on hibiscus to maintain natural hair color and delay graying. Its antioxidant properties fight free radicals, which are often responsible for premature aging of hair.

  1. Deep Conditioning & Scalp Health

Hibiscus flowers and leaves act as a natural conditioner. They nourish the scalp, improve blood circulation, and provide relief from dandruff and dryness. The natural oils in hibiscus also keep the scalp moisturized and itch-free.

How To Use Hibiscus for Long, Gorgeous Hair

The versatility of hibiscus makes it an ideal ingredient for various hair care routines. Here are some effective DIY remedies to try:

  1. Hibiscus Hair Mask for Growth

Ingredients:

  • Hibiscus Flowers: 4–5 fresh petals
  • Hibiscus Leaves: 7–8 leaves
  • Yogurt: 2 tablespoons (for added nourishment)

Instructions:

  1. Grind the hibiscus petals and leaves into a fine paste.
  2. Mix the paste with yogurt to form a smooth mixture.
  3. Apply the mask from the roots to the tips of your hair.
  4. Leave it on for 30–45 minutes before rinsing with lukewarm water.

Benefits: This mask revitalizes hair follicles, providing deep conditioning and enhancing growth.

  1. Hibiscus Oil for Scalp Nourishment

Ingredients:

  • Hibiscus Flowers: 10 petals (dried or fresh)
  • Coconut Oil: 1 cup (or olive oil for added shine)

Instructions:

  1. Heat the oil in a pan and add the hibiscus petals.
  2. Let the petals infuse for 5–10 minutes on low heat.
  3. Allow the oil to cool down, strain, and store it in a clean bottle.
  4. Massage the oil onto your scalp twice a week for best results.

Benefits: Regular oil massages boost blood circulation, strengthen roots, and promote healthy hair growth.

  1. Hibiscus Rinse for Natural Shine

Ingredients:

  • Hibiscus Flowers: 5 petals
  • Water: 2 cups

Instructions:

  1. Boil the petals in water for about 10 minutes.
  2. Strain the mixture and let it cool.
  3. Use the water as a final rinse after shampooing.

Benefits: Adds a natural shine to your hair and keeps it soft and frizz-free.

Why Hibiscus Remains Unmatched in Hair Care

Unlike chemical treatments that only provide temporary results, hibiscus nurtures hair from the inside out. It’s not just about aesthetics; it’s about health, resilience, and long-lasting beauty.

Whether you’re dealing with hair thinning, dullness, or just longing for luscious locks, hibiscus can transform your hair game. Its natural healing properties have made it a cornerstone in Indian hair care routines for centuries.

Final Thoughts: Embrace Hibiscus for Hair That Speaks of Strength and Beauty

Hibiscus for Long Hair: India’s age-old secret to long, healthy hair is right in your backyard. The hibiscus flower is not just another ingredient—it’s a powerful remedy gifted by nature. If you’re ready to move away from synthetic products and embrace a more natural approach to hair care, hibiscus is the perfect starting point.

How to Manage Natural Light in Home: The Ultimate Guide for a Brighter, Healthier Space

How to Manage Natural Light in Home: The Ultimate Guide for a Brighter, Healthier Space

Natural light isn’t just about aesthetics—it’s about energy, mood, and functionality. A well-lit home feels spacious, inviting, and alive, while poor lighting can make even the most beautifully decorated space feel dull and uninspiring. Instead of relying on artificial lighting that increases energy costs, why not harness natural light effectively?

See How to Manage Natural Light in Home: Managing natural light in your home is both an art and a science. It’s about direction, intensity, reflection, and control. Whether your home is flooded with sunlight or struggles with dim corners, this guide will help you maximize and balance natural light smartly.

Why Natural Light Matters in Your Home

Before jumping into techniques, let’s address why natural light is crucial:

Enhances Mood & Productivity – Sunlight boosts serotonin levels, keeping you happy and energetic.
Saves Energy Costs – Less dependence on artificial lighting means lower electricity bills.
Creates a Spacious Feel – Natural light opens up a space, making rooms feel larger and airier.
Improves Sleep Patterns – Exposure to daylight regulates circadian rhythms, leading to better sleep.
Boosts Home Aesthetics – Colors appear more vibrant, textures come alive, and interiors feel more natural.

Now, let’s get into How to Manage Natural Light in Home and optimize natural light in your home effectively.

  1. Understand the Direction of Natural Light

Different rooms receive different intensities of sunlight based on their orientation. Here’s how to use this knowledge to your advantage:

  • North-facing rooms – Get soft, consistent light. Ideal for offices or study rooms where glare-free light is needed.
  • South-facing rooms – Receive the most sunlight throughout the day. Great for living rooms and areas where you want warmth.
  • East-facing rooms – Bright in the morning, softer in the afternoon. Perfect for breakfast nooks or morning workout spaces.
  • West-facing rooms – Strong, golden light in the evening. Can get too warm, so use light-filtering curtains.

🛠 Action Tip: Observe how sunlight moves through your home. Rearrange furniture accordingly—work spaces near north-facing windows, lounging areas in south-facing zones, and cozy reading corners in west-facing spots.

  1. Use Reflective Surfaces to Amplify Light

If your home lacks direct sunlight, reflection is your best friend. Instead of adding artificial lighting, strategically place reflective materials to bounce light around the room.

🔹 Mirrors – Placing a large mirror opposite a window doubles the natural light effect.
🔹 Glossy Surfaces – Use furniture with glossy finishes, glass tabletops, or polished floors to reflect sunlight.
🔹 Metallic Accents – Brass, chrome, and silver decor can subtly reflect light and create a warm glow.
🔹 White or Light-Colored Walls – Dark walls absorb light, while white or pastel shades help spread brightness.

🛠 Action Tip: If you have a small or dark room, add a floor-to-ceiling mirror to create an illusion of more space and light.

  1. Smart Window Treatments: Balance Light & Privacy

Too much sunlight can be harsh and uncomfortable, while too little makes a room feel gloomy. The key is to control light without blocking it completely.

🌞 For Bright Spaces (South/West-facing windows)

  • Use sheer curtains or light-filtering blinds to diffuse harsh sunlight without darkening the room.
  • Opt for adjustable blinds that let you control the intensity of light throughout the day.

🌥 For Dim Spaces (North/East-facing windows)

  • Choose light-colored or translucent curtains to maximize incoming light.
  • Avoid heavy, dark drapes that absorb light and make the space feel even darker.

🛠 Action Tip: Use double-layer curtains—a sheer layer for daylight and a blackout layer for privacy at night.

  1. Incorporate Skylights & Clerestory Windows

If your home lacks large windows, skylights and clerestory windows are game changers.

  • Skylights – Installed on the ceiling, these bring in abundant daylight while maintaining privacy.
  • Clerestory Windows – High-positioned windows near the roof allow light to enter without direct glare.

🛠 Action Tip: If a renovation is possible, install a skylight in dark hallways, kitchens, or bathrooms for a natural light boost.

  1. Optimize Indoor Plants for Light Management

How to Manage Natural Light in Home: Indoor plants do more than purify air—they help filter and manage sunlight effectively.

🌿 For Excess Sunlight – Use tall indoor plants like Areca Palm or Fiddle Leaf Fig near windows to diffuse harsh light.
🌿 For Low-Light Areas – Introduce light-reflecting plants like Snake Plant or Peace Lily, which thrive in indirect light while making the space look fresher.

🛠 Action Tip: Place potted plants near windows where light is too strong to create a natural green filter.

  1. Light-Friendly Furniture & Layout Hacks

Your choice of furniture and its placement can significantly impact natural light flow.

🚪 Open Spaces Work Best – Arrange furniture to allow light to travel freely. Avoid blocking windows with heavy furniture.
🎨 Light-Colored Furniture Reflects Light – Opt for pastel shades, neutral tones, and wooden finishes over dark upholstery.
🪑 Low-Profile Furniture Maintains Openness – Use low-height sofas and glass tables to keep the space visually open and airy.

🛠 Action Tip: If your room feels too dark, replace dark upholstery with lighter-colored fabrics for an instant brightening effect.

  1. Use Artificial Light to Complement Natural Light

Even with perfect natural lighting, the right artificial lighting setup enhances brightness and maintains balance.

💡 Layer Your Lighting – Combine ambient, task, and accent lighting to prevent harsh contrasts.
💡 Warm vs. Cool Bulbs – Use warm white lights (2700K-3000K) in cozy areas and cool daylight bulbs (4000K-5000K) in workspace.
💡 Dimmable Lights for Flexibility – Adjust brightness to match the amount of natural light available.

🛠 Action Tip: Install motion-sensor lights in areas where natural light fluctuates, like hallways and bathrooms.

Final Thoughts: Let Natural Light Work for You

How to Manage Natural Light in Home isn’t about getting more windows—it’s about using what you already have wisely. Whether it’s positioning furniture strategically, using reflective surfaces, or installing sheer curtains, small changes can make a huge difference.

A well-lit home isn’t just about aesthetics—it’s about enhancing mood, reducing energy consumption, and making your living space truly vibrant.

Now it’s your turn—optimize your home’s natural light and enjoy a brighter, happier space! 🌞✨

Ragi Benefits in Summer: The Ultimate Super food for the Hot Season

Ragi Benefits in Summer: The Ultimate Super food for the Hot Season

As summer sets in, keeping the body cool, hydrated, and nourished becomes a priority. While many turn to chilled drinks and fruits, few realize the power of ragi—a nutrient-dense super food that is an absolute game-changer for the hot season. Often overlooked in Favor of trendier grains, ragi (finger millet) is a powerhouse of health benefits that can help you combat heat, boost energy, and maintain overall well-being.

Why Ragi is the Best Summer Super food

Ragi is not just another grain—it’s a nutritional goldmine packed with cooling properties, hydration benefits, and essential minerals that support the body’s needs during peak summer. Unlike heavy grains that can leave you feeling bloated, ragi is light, digestible, and incredibly refreshing.

Let’s explore why ragi deserves a prime spot in your summer diet.

  1. Natural Body Cooler

One of the biggest challenges of summer is managing body heat. High temperatures can cause excessive sweating, leading to dehydration and fatigue. Ragi, rich in essential amino acids and fibre, has natural cooling properties that regulate body temperature and prevent heat-related discomfort. Consuming ragi-based foods like ragi porridge or ragi malt can help in keeping you cool from within by these Ragi Benefits in Summer.

  1. Prevents Dehydration and Keeps You Hydrated

Dehydration is a common summer woe, but ragi works wonders in keeping moisture levels intact in the body. The high fibre content in ragi slows digestion, ensuring a steady release of hydration and preventing sudden water loss. Unlike refined grains that can make you feel parched, ragi retains fluids and provides sustained hydration throughout the day.

  1. Boosts Energy Without Overheating the Body

Feeling drained in summer? Most energy-boosting foods are either heavy or loaded with sugars, leading to sluggishness. Ragi, on the other hand, is a natural energizer. Packed with complex carbohydrates, it releases energy gradually, preventing sudden spikes and crashes. Whether you’re hitting the gym or simply going about your daily activities, ragi ensures you stay active and refreshed.

  1. Supports Weight Management During Summer

Shedding excess weight is a goal for many during summer, but crash diets and extreme workouts can do more harm than good. Ragi is a metabolism-boosting grain that naturally aids weight loss. The high fibre content keeps you full for longer, curbing unnecessary cravings. Unlike processed snacks that leave you feeling guilty, ragi meals provide lasting satiety without packing on the calories.

  1. A Digestive Super food for Hot Weather

Digestive issues like bloating, acidity, and indigestion are common in summer due to excessive heat and improper eating habits. Ragi is naturally gluten-free, alkaline, and easy on the stomach, making it perfect for those with sensitive digestion. It promotes gut health, prevents constipation, and ensures smooth digestion—keeping you light and comfortable even in the scorching heat by these Ragi Benefits in Summer.

  1. Packed with Calcium and Bone-Strengthening Nutrients

Summer often leads to increased physical activity, whether it’s outdoor sports, travel, or workouts. Strong bones are essential to keep up with these activities, and ragi is one of the best plant-based sources of calcium. A daily serving of ragi strengthens bones, prevents osteoporosis, and ensures overall skeletal health—without the need for dairy.

  1. Regulates Blood Sugar Levels

High temperatures can sometimes lead to fluctuating blood sugar levels, especially for diabetics. Ragi is a low glycaemic index grain that prevents sudden sugar spikes, making it an excellent choice for managing diabetes in summer. Its slow-digesting properties help in maintaining stable glucose levels, keeping you active and free from energy crashes.

  1. A Natural Skin Detoxifier for Glowing Skin

Summer heat often leads to dull, acne-prone skin due to excessive sweating and toxin buildup. Ragi is rich in antioxidants and amino acids that help flush out toxins, keeping your skin fresh and glowing. It also combats premature aging, thanks to its collagen-boosting properties. Including ragi in your diet can naturally enhance skin radiance and prevent summer-related skin issues by Ragi Benefits in Summer.

  1. Strengthens Immunity to Fight Seasonal Illnesses

Summer brings its share of infections, from heat strokes to digestive ailments. Ragi is loaded with essential nutrients like iron, magnesium, and vitamins that boost immunity. Regular consumption helps in warding off seasonal illnesses, ensuring you stay strong and healthy all summer long.

  1. Versatile and Delicious for Every Summer Meal

The best part about ragi? Its versatility! From refreshing ragi buttermilk to cooling ragi porridge, from energy-packed ragi laddies to hydrating ragi smoothies, the options are endless. It seamlessly fits into breakfast, lunch, or snacks, offering both nutrition and taste. Below some recipes will help to avail Ragi Benefits in Summer.

Refreshing Ragi Drinks & Recipes for Summer
  1. Ragi Buttermilk (Ragi Mojige)

Ingredients:

  • 2 tbsp ragi flour
  • 1 cup buttermilk
  • 1/2 tsp cumin powder
  • A pinch of salt
  • Fresh coriander leaves (optional)
    Method:
  1. Mix ragi flour with a little water to form a smooth paste.
  2. Add this paste to buttermilk, stirring continuously.
  3. Add cumin powder, salt, and mix well.
  4. Serve chilled with fresh coriander leaves for added flavor.
  1. Ragi Coconut Smoothie

Ingredients:

  • 2 tbsp ragi flour
  • 1/2 cup coconut milk
  • 1 banana
  • 1 tbsp honey
  • Ice cubes
    Method:
  1. Cook ragi flour in a little water to form a smooth porridge.
  2. Blend it with coconut milk, banana, and honey until smooth.
  3. Add ice cubes and serve chilled.
  1. Ragi Summer Porridge

Ingredients:

  • 3 tbsp ragi flour
  • 1 cup cold milk or almond milk
  • 1 tbsp jaggery or honey
  • 1/2 tsp cardamom powder
    Method:
  1. Cook ragi flour in water, stirring continuously to avoid lumps.
  2. Let it cool and add cold milk, jaggery, and cardamom powder.
  3. Mix well and serve chilled.
  1. Ragi Lemonade

Ingredients:

  • 2 tbsp ragi flour
  • 1 glass cold water
  • Juice of 1 lemon
  • 1 tbsp honey
  • Ice cubes
    Method:
  1. Mix ragi flour with water and cook for a few minutes.
  2. Let it cool, then add lemon juice and honey.
  3. Stir well and serve with ice cubes.
Conclusion

This summer, ditch the unhealthy cooling drinks and calorie-laden foods. Embrace ragi—nature’s gift for a healthier, cooler, and more energetic season. Whether you want to stay hydrated, manage weight, boost energy, or enhance your skin’s glow, ragi is the answer. Make it a staple in your diet and experience the difference in your overall health and well-being by Ragi Benefits in Summer.

Don’t just survive summer—thrive with ragi!


How to Lift Your Drooping Eyes? Brighten & Rejuvenate Them Naturally!

✨ How to Lift Your Drooping Eyes? Brighten & Rejuvenate Them Naturally!

Drooping eyes, also known as hooded or sagging eyelids, can make you look tired, older, or even impact your vision. Whether it’s due to aging, fatigue, genetics, or lifestyle habits, sagging eyelids don’t have to be a permanent issue. With the right care, exercises, and treatments, you can lift and brighten your eyes naturally while maintaining a youthful and refreshed look. Solutions are here for How to Lift Your Drooping Eyes.

If you’ve been wondering how to fix drooping eyes without surgery or harsh treatments, this guide will give you the most effective strategies to combat sagging eyelids and restore their firmness.

🧐 1. Why Do Eyelids Droop? Understanding the Root Cause

Before you jump into solutions, it’s essential to understand why your eyelids are sagging in the first place. Drooping eyes can be caused by:

🔹 Aging & Loss of Collagen

As we age, the skin loses collagen and elasticity, making eyelids sag over time.

🔹 Fatigue & Stress

Lack of sleep and excessive screen time can weaken the skin around the eyes, causing it to look puffy and droopy.

🔹 Dehydration & Poor Nutrition

When your body lacks essential nutrients and hydration, the delicate eye area suffers the most.

🔹 Genetics

Some people naturally have hooded eyes or drooping eyelids due to hereditary factors.

🔹 Weak Eye Muscles

Muscle weakness around the eyes can cause the upper eyelid to sag, making eyes look heavy and tired.

🏋️‍♀️ 2. Eyelid Exercises: Natural Lifting Without Surgery

Just like you work out to tone your body, your eyelids need their own set of exercises to stay firm and lifted. How to Lift Your Drooping Eyes:-

🔸 Eyelid Resistance Lift

  • Close your eyes gently.
  • Place your fingertips on your eyebrows and try to lift them while keeping your eyes closed.
  • Hold for 5-10 seconds and repeat 10 times.

🔸 Eye Stretching Workout

  • Raise your eyebrows as high as possible while keeping your eyes wide open.
  • Hold for 10 seconds and repeat 10-15 times daily.

🔸 Blink & Squeeze Method

  • Close your eyes tightly for 3 seconds, then open them wide.
  • Repeat 10 times to strengthen eye muscles.

These simple workouts can help tone your eyelids, making them look naturally lifted over time.


🍃 3. Home Remedies to How to Lift Drooping Eyes

🔹 Cold Cucumber Therapy

Cucumbers are packed with antioxidants and hydration to refresh tired eyes.

  • Place chilled cucumber slices over your eyelids for 10-15 minutes daily to reduce sagging.

🔹 Egg White Eye Mask

Egg whites tighten the skin instantly, making them a powerful remedy for droopy eyelids.

  • Apply a thin layer of egg white over your eyelids, let it dry for 10 minutes, then rinse off.

🔹 Aloe Vera Magic

Aloe Vera’s hydrating and skin-tightening properties help lift sagging skin.

  • Apply fresh aloe vera gel around your eyes and leave it on for 15 minutes before rinsing.

🔹 Green Tea Compress

Rich in antioxidants, green tea reduces puffiness and firms up the skin.

  • Dip cotton pads in chilled green tea and place them over your eyes for 10 minutes.

🔹 Hydration & Proper Sleep

Dehydration and lack of sleep make drooping eyelids worse.

  • Drink plenty of water and ensure you sleep at least 7-8 hours every night.
💆 4. Facial Massages & Lymphatic Drainage for Instant Lift

Massaging your face, especially around the eyes, boosts circulation and reduces sagging.

🔸 Eye Massage Technique

  • Gently tap around your eyes using your ring finger to stimulate blood flow.
  • Use upward strokes with a light moisturizer or eye serum to lift the skin.

🔸 Gua Sha & Jade Roller Therapy

  • These tools help improve lymphatic drainage and reduce puffiness.
  • Use them daily in an upward motion for a visible lift.
🌿 5. Skincare Tips to Keep Your Eyelids Firm & Healthy

🔹 Invest in an Eye Cream with Retinol & Peptides

Retinol boosts collagen, while peptides strengthen skin elasticity.

🔹 Always Use Sunscreen on Eyelids

Sun exposure can break down collagen and accelerate sagging.

🔹 Stay Away from Harsh Rubbing

Avoid rubbing your eyes aggressively, as it can weaken the delicate skin.

🔹 Keep Your Eye Area Hydrated

Use hyaluronic acid-based creams to keep your eyelids firm and plump.

⚡ 6. When to Consider Medical Treatments?

How to Lift Your Drooping Eyes with Medication: If your drooping eyelids severely impact your vision or confidence, medical treatments might be an option.

🔹 Botox for a Temporary Lift

  • Botox injections relax certain muscles and create a lifting effect for a few months.

🔹 Plasma Fibroblast Therapy

  • A non-surgical treatment that tightens eyelid skin by stimulating collagen production.

🔹 Blepharoplasty (Eyelid Surgery)

  • If your droopy eyelids obstruct your vision, a minor surgical procedure can remove excess skin.
🌟 7. Lifestyle Changes to Prevent Eyelid Drooping

🔸 Quit Smoking & Reduce Alcohol Consumption

Both can weaken collagen, accelerating sagging.

🔸 Maintain a Collagen-Rich Diet

Include foods like bone broth, berries, citrus fruits, and leafy greens to keep your skin firm.

🔸 Reduce Screen Time & Take Eye Breaks

Excessive screen exposure strains your eyes, leading to tired, droopy lids.

🔸 Sleep with Your Head Elevated

This prevents fluid retention and puffiness around the eyes.


🎯 Say Goodbye to Drooping Eyes Naturally!

How to Lift Your Drooping Eyes: Drooping eyelids may seem like an inevitable issue, but the right combination of exercises, home remedies, massages, skincare, and lifestyle changes can significantly lift and brighten your eyes. You don’t have to resort to surgery or expensive treatments—start with natural techniques and see the transformation for yourself.

The secret to youthful, lifted eyes lies in consistency. Adopt these methods into your daily routine and watch your drooping eyelids turn into firm, refreshed, and radiant eyes. 💖

Kitchen Chic: How to Label Your Kitchen Essentials Attractively and Stay Organized!

Kitchen Chic: How to Label Your Kitchen Essentials Attractively and Stay Organized! 🏠

A well-organized kitchen isn’t just about neat cabinets and tidy countertops—it’s about creating a space where everything has a home, and nothing disrupts the cooking flow. Attractive labeling plays a massive role in achieving this goal, adding both function and flair to your kitchen. From spices to pantry staples, the right labeling can transform your kitchen into a harmonious and efficient space. Let’s dive into how you can label your kitchen essentials in a way that is not only practical but also visually stunning.

🧂 1. Why Labeling Matters: More Than Just a Pretty Touch

Labeling isn’t just about aesthetics; it offers practical benefits that make your kitchen life so much easier by Label Your Kitchen Essentials.

The Benefits of Kitchen Labeling:
  • Eliminates Guesswork: No more mistaking salt for sugar! Clear labels to Label Your Kitchen Essentials ensure you grab the right ingredient every time.
  • Enhances Organization: Categorize and arrange items logically, reducing clutter.
  • Speeds Up Cooking: Knowing exactly where everything is cuts down on prep time.
  • Adds Style: Labels can complement your kitchen decor, adding a personalized touch.
🎨 2. Get Creative: Different Labeling Styles for Different Needs

When it comes to labeling, there’s no one-size-fits-all approach. The best method depends on your kitchen’s style, your storage containers, and your personal taste.

Chalkboard Labels:
  • Best For: Jars, spice containers, and pantry bins.
  • Style: Rustic and versatile—perfect for farmhouse or boho kitchens.
  • Pro Tip: Use waterproof chalk markers to prevent smudging.
Clear and Minimalist Labels:
  • Best For: Transparent containers where you want the contents to shine through.
  • Style: Modern, clean, and sleek. Ideal for minimalist kitchens.
  • Pro Tip: Use simple fonts and keep labels uniform for a streamlined look.

Vinyl Decals:
  • Best For: Large containers, drawers, and even kitchen cabinets.
  • Style: Customizable and available in a variety of fonts and colors.
  • Pro Tip: Choose decals that contrast with the container’s color to enhance readability.
Handwritten Labels:
  • Best For: A personal touch on homemade goods, gift jars, or specialty items.
  • Style: Adds charm and warmth to your kitchen.
  • Pro Tip: Use quality label paper and permanent ink to maintain a neat appearance.
🥫 3. Labeling Pantry Essentials: Make Your Storage Pinterest-Worthy!

A well-labeled pantry not only looks incredible but also prevents food waste and overbuying.

Start with Clear Containers:
  • Transfer pantry staples like grains, pasta, and snacks into transparent, airtight containers. This keeps food fresh and allows you to see when you’re running low.

Use Uniform Labels:
  • Maintain consistency by using the same label type and style throughout the pantry to Label Your Kitchen Essentials.
  • Include both the product name and expiration date for easy access.
Group by Category:
  • Organize items into categories such as baking supplies, snacks, breakfast items, and label the shelves or baskets accordingly.
Add Extra Information:
  • If you buy in bulk, add cooking instructions or measurement conversions directly on the label.
🍽️ 4. Spice Things Up: Labeling Your Spice Jars Like a Pro

A well-labeled spice rack is a game-changer for any home chef.

Choose the Right Containers:
  • Opt for identical spice jars with transparent or glass designs. Uniformity is key to a professional look.
Arrange Alphabetically:
  • Label jars clearly with spice names, and arrange them in alphabetical order for quick access.
Color-Code for Cuisines:
  • If you love cooking international dishes, color-code labels by cuisine (e.g., green for Italian, red for Indian) to add a creative twist.
🥄 5. Drawers and Cabinets: Make Hidden Spaces Organized and Accessible

Out of sight shouldn’t mean out of order! Labeling drawers and cabinets can make a huge difference.

Drawer Labels:
  • Use simple labels to indicate the contents of each drawer, such as ‘Cutlery,’ ‘Utensils,’ or ‘Baking Tools.’
  • Stick labels on the outside or use transparent inserts within the drawer for a subtle approach.
Cabinet Door Labels:
  • Apply labels on the inside of cabinet doors to identify where each item belongs, making it easier for the entire household to maintain order.
Use Icon Labels for Kids:
  • If you have children, use icons along with text labels to help them learn where things go. This encourages tidiness and independence.
🧴 6. Don’t Forget the Fridge: Labeling for Freshness and Efficiency

The fridge is often overlooked in kitchen organization, but labeling here can save you time and money.

Designate Zones:
  • Create zones for produce, dairy, snacks, and leftovers. Label shelves or bins accordingly.
Add Dates to Labels:
  • When storing leftovers or meal-prepped items, include the date it was made to avoid confusion and reduce food waste.
Use Washable Labels:
  • For containers that frequently change contents, use dry-erase labels or reusable sticker labels.

✨ 7. Make It Attractive: Adding Style to Your Kitchen Labels

Aesthetics matter! Here’s how to make your labels part of your kitchen’s decor:

Play with Fonts and Colors:
  • Match label fonts and colors to your kitchen’s design theme—whether it’s rustic, modern, vintage, or eclectic.
Add Decorative Elements:
  • Use borders, icons, or small illustrations on your labels to enhance their appearance.
Incorporate a Theme:
  • Choose a theme, like vintage apothecary or modern minimalist, and stick with it throughout your kitchen.
🎯 8. Quick Tips for Maintaining Your Labeled Kitchen
  • Update Labels Regularly: As contents change, refresh your labels to avoid confusion.
  • Clean Containers Before Relabeling: Remove old labels completely to maintain a polished look.
  • Label Everything: From pantry items to cleaning supplies—consistency is key.
🏆 Labeling for Beauty and Functionality

Labeling your kitchen essentials is more than just a practical step—it’s an art form. With the right labels, you can transform your kitchen into an organized, visually pleasing space where cooking becomes a joy, not a chore. Whether you prefer a vintage, rustic vibe or a clean, modern look, there’s a labeling method to match your style and elevate your kitchen’s aesthetic. So go for Label Your Kitchen Essentials now.

So, grab those labels, get creative, and watch your kitchen transform into the most organized (and attractive) room in your home!

You may also like to read…

Exit mobile version