


How to Install Curtain Rods in Your Bathroom: A Complete and Assertive Guide:
Installing curtain rods in your bathroom is not just a functional improvement—it’s a way to elevate the entire look of the space. Whether you’re installing a shower curtain for added privacy or using a decorative curtain to create a specific atmosphere, the process is straightforward if you know what you’re doing. Follow this comprehensive and detailed guide to install your curtain rod with precision and confidence.


Step 1: Select the Right Curtain Rod
Before you get started, you need to choose the correct curtain rod for your bathroom. Don’t rush this decision—your curtain rod will influence both the look and functionality of your space.
Shower Rods vs. Decorative Curtain Rods

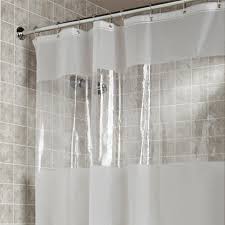
If you’re hanging a shower curtain, you’ll need a shower rod, either straight or curved, depending on your preference. A curved rod will give you extra space inside the shower, which can be particularly useful in smaller bathrooms. A straight rod is a classic choice for most bathtubs and shower enclosures.
If you want to add some elegance to your bathroom, a decorative curtain rod is a great option. These rods can enhance your bathroom’s style, especially if you plan to hang curtains around a window or a tub area.
Step 2: Measure the Right Placement
Accurate measurements are critical when installing your curtain rod. Improper placement can lead to uneven curtains, gaps, or a cluttered appearance.
Height
Measure about 6–12 inches above the shower or bathtub to mount your rod. This ensures that the curtain hangs properly and covers the entire space. If you’re using the curtain for decorative purposes around a window, consider hanging the rod at least 4 inches above the window frame to create the illusion of taller ceilings.
Width
For a shower curtain rod, make sure the rod extends beyond the edges of the shower or bathtub by at least 2–4 inches on both sides. This extra width ensures that the curtain fully covers the shower or tub area when pulled across.
Step 3: Gather Your Tools and Materials
Before you start drilling, make sure you have all the necessary tools on hand. You don’t want to get halfway through and realize you’re missing something important.
Tools You’ll Need:

- Drill: A power drill is essential for drilling holes in the wall.
- Screwdriver: You’ll need this to tighten the screws into place.
- Level: This ensures that your curtain rod is straight, avoiding a lopsided appearance.
- Pencil or Marker: For marking the drilling spots accurately.
- Measuring Tape: To ensure proper placement and distance.
- Ladder or Step Stool: This is crucial if you’re working at a height, like above a tub or shower.
Materials to Have:
- Curtain Rod: Choose one that fits the width of your shower or window.
- Brackets: These will hold the rod in place.
- Screws: Ensure you use screws that are appropriate for your wall type.
- Wall Anchors: If you’re drilling into drywall or plaster, use anchors to ensure the screws stay securely in place.
Step 4: Mark the Drill Spots
Now it’s time to do the prep work. Using a pencil or marker, mark the spots where the brackets will be placed. These should be at the height and width that you measured earlier. For a shower curtain rod, ensure that the marks align evenly across both sides of the shower or tub.
Use a level to check that your markings are straight. A crooked curtain rod will make the bathroom look unprofessional and may cause the curtain to hang unevenly. Double-check your measurements and make any necessary adjustments.
Step 5: Drill the Holes
Before you drill, make sure you know what type of wall you’re working with—drywall, tile, or another material—because different walls require different types of anchors and drill bits.
For Drywall or Plaster:
- Use a drill with the appropriate bit for the size of your wall anchors.
- Drill the holes at the marked spots, making sure the holes are deep enough for the wall anchors.
- Insert the wall anchors into the holes.
For Tile or Stone:
- Use a masonry drill bit to create small pilot holes in the tile.
- Make sure to drill slowly to avoid cracking the tile.
Step 6: Install the Brackets
Now that the holes are drilled and the wall anchors (if needed) are in place, it’s time to install the brackets that will hold your curtain rod.
Position each bracket at the drilled spots and use a screwdriver to insert the screws, securing them into place. Make sure each bracket is level and aligned before tightening the screws completely.
Step 7: Attach the Curtain Rod
Once the brackets are securely in place, slide the curtain rod onto the brackets. Ensure that the rod is properly seated in each bracket so that it doesn’t fall or slide out.
If you’re using a shower curtain rod, you may need to install the curtain rings or hooks at this point. Attach the curtain rings to the rod before you hang your curtain.

Step 8: Hang the Curtain
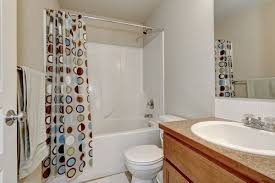
Finally, hang your curtain on the rod. Adjust the curtain so that it drapes evenly and covers the desired area. If you’re using a shower curtain, make sure the bottom of the curtain touches the floor or tub, depending on your design preference.
Final Thoughts
Installing curtain rods in your bathroom may seem like a minor task, but when done correctly, it can make a significant impact on both the functionality and aesthetic of your space. By following these steps with care and attention to detail, you’ll ensure that your curtain rods are mounted securely and look great. Don’t rush through the process—take your time to measure carefully and choose the right materials for a polished finish.
Now, sit back and admire your hard work—your bathroom will feel brand new with this simple yet impactful update!