Homemade Indian Tan Removal: Natural Remedies for Radiant Skin

Homemade Indian Tan Removal: Natural Remedies for Radiant Skin

India’s sun, while a source of energy and vitality, can also leave stubborn tanning on the skin. Harsh UV rays trigger melanin production, causing dark patches, uneven skin tone, and dullness. Instead of relying on chemical-laden creams that promise instant fairness, why not harness the power of Indian home remedies that have been used for centuries?

This article reveals the best homemade Indian tan removal solutions—powerful, natural, and skin-friendly. Get ready to bring back your natural glow!

Why Choose Homemade Indian Tan Removal Remedies?
  • Safe & Chemical-Free – Unlike commercial creams, these remedies are gentle and free from harsh ingredients.
  • Deeply Nourishing – They not only remove tan but also heal and rejuvenate the skin.
  • Budget-Friendly – Most ingredients are already in your kitchen!
  • Long-Lasting Results – Natural ingredients work on the root cause, ensuring healthier skin over time.
Powerful Homemade Indian Tan Removal Remedies
  1. Besan (Gram Flour) & Turmeric Ubtan – The Classic Tan Remover

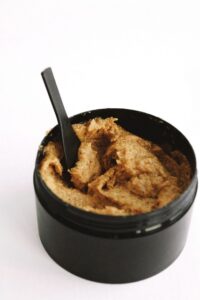
This ancient Ayurvedic recipe has been used by Indian brides for generations to get glowing, tan-free skin.

Ingredients:

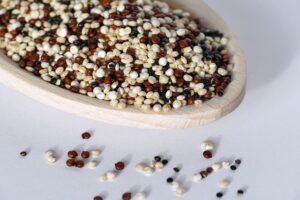
  • 2 tbsp besan (gram flour)
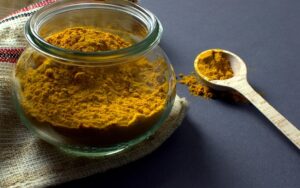
  • A pinch of turmeric
  • 1 tbsp curd (or milk for dry skin)
  • 1 tsp lemon juice (optional)
  • Rose water (to adjust consistency)

How to Use:

  1. Mix all the ingredients into a thick paste.
  2. Apply evenly on the tanned areas and let it dry for 15-20 minutes.
  3. Gently scrub in circular motions before washing off with lukewarm water.
  4. Use 3 times a week for best results.

Why It Works: Besan exfoliates dead skin, turmeric brightens, and curd deeply nourishes.

  1. Aloe Vera & Potato Juice – The Instant Cooling Remedy

This soothing remedy works like a charm to reduce tan and inflammation caused by sun exposure.

Ingredients:

  • 2 tbsp fresh aloe vera gel
  • 3 tbsp potato juice (grated and strained)
  • 1 tsp honey

How to Use:

  1. Mix aloe vera gel and potato juice until smooth.
  2. Apply with a cotton pad to tanned areas.
  3. Leave for 30 minutes and rinse with cool water.
  4. Use daily for visible results.

Why It Works: Aloe vera hydrates and heals, while potato juice naturally lightens tan.

  1. Coffee & Rice Flour Scrub – The Ultimate De tan Exfoliator

A homemade scrub that effectively removes dead skin cells and deep-seated tan.

Ingredients:

  • 1 tbsp coffee powder
  • 1 tbsp rice flour
  • 1 tbsp curd or raw milk
  • 1 tsp coconut oil (optional for dry skin)

How to Use:

  1. Mix all ingredients into a paste.
  2. Gently scrub for 5 minutes in circular motions.
  3. Leave on for 10 more minutes, then rinse off.
  4. Use twice a week for smooth, even-toned skin.

Why It Works: Coffee reduces pigmentation, rice flour exfoliates, and curd brightens skin.

  1. Tomato & Honey Face Pack – The Instant Glow Booster

Next in the Homemade Indian Tan Removal, Tomato is a natural bleaching agent that removes tan without stripping moisture from the skin.

Ingredients:

  • 2 tbsp fresh tomato pulp
  • 1 tsp honey
  • 1 tsp lemon juice

How to Use:

  1. Mix the ingredients and apply on affected areas.
  2. Leave for 20 minutes and rinse with lukewarm water.
  3. Use daily for a natural glow.

Why It Works: Tomato removes tan, honey hydrates, and lemon fades dark spots.

  1. Milk & Saffron – The Royal Skin Lightener

Used by Indian royalty, this remedy deeply nourishes and removes even the most stubborn tan.

Ingredients:

  • 3 tbsp raw milk
  • 4-5 saffron strands
  • 1 tsp sandalwood powder

How to Use:

  1. Soak saffron in warm milk for 15 minutes until it releases color.
  2. Add sandalwood powder and mix.
  3. Apply as a leave-on serum or wash off after 30 minutes.
  4. Use 3 times a week for a natural radiance.

Why It Works: Saffron enhances skin tone, sandalwood soothes, and milk nourishes.

Bonus: Lifestyle Tips for Tan-Free Skin

Hydrate Well – Drink coconut water, buttermilk, and fresh juices to keep skin cool.
Use Sunscreen – Always wear sunscreen with SPF 30+ before stepping out.
Cover Up – Use a scarf or hat to protect your skin from direct sun exposure.
Eat Skin-Friendly Foods – Include citrus fruits, almonds, and green veggies for natural skin repair.

Conclusion: Glow Naturally with These Home Remedies!

Forget expensive skin treatments—Homemade Indian Tan Removal offer the safest and most effective way to remove tan naturally. Whether it’s ubtan, aloe vera, coffee scrubs, or saffron milk, these time-tested solutions bring out your skin’s natural glow.

Choose nature over chemicals and let your skin breathe! 🌿✨

Ragi Benefits in Summer: The Ultimate Super food for the Hot Season

Ragi Benefits in Summer: The Ultimate Super food for the Hot Season

As summer sets in, keeping the body cool, hydrated, and nourished becomes a priority. While many turn to chilled drinks and fruits, few realize the power of ragi—a nutrient-dense super food that is an absolute game-changer for the hot season. Often overlooked in Favor of trendier grains, ragi (finger millet) is a powerhouse of health benefits that can help you combat heat, boost energy, and maintain overall well-being.

Why Ragi is the Best Summer Super food

Ragi is not just another grain—it’s a nutritional goldmine packed with cooling properties, hydration benefits, and essential minerals that support the body’s needs during peak summer. Unlike heavy grains that can leave you feeling bloated, ragi is light, digestible, and incredibly refreshing.

Let’s explore why ragi deserves a prime spot in your summer diet.

  1. Natural Body Cooler

One of the biggest challenges of summer is managing body heat. High temperatures can cause excessive sweating, leading to dehydration and fatigue. Ragi, rich in essential amino acids and fibre, has natural cooling properties that regulate body temperature and prevent heat-related discomfort. Consuming ragi-based foods like ragi porridge or ragi malt can help in keeping you cool from within by these Ragi Benefits in Summer.

  1. Prevents Dehydration and Keeps You Hydrated

Dehydration is a common summer woe, but ragi works wonders in keeping moisture levels intact in the body. The high fibre content in ragi slows digestion, ensuring a steady release of hydration and preventing sudden water loss. Unlike refined grains that can make you feel parched, ragi retains fluids and provides sustained hydration throughout the day.

  1. Boosts Energy Without Overheating the Body

Feeling drained in summer? Most energy-boosting foods are either heavy or loaded with sugars, leading to sluggishness. Ragi, on the other hand, is a natural energizer. Packed with complex carbohydrates, it releases energy gradually, preventing sudden spikes and crashes. Whether you’re hitting the gym or simply going about your daily activities, ragi ensures you stay active and refreshed.

  1. Supports Weight Management During Summer

Shedding excess weight is a goal for many during summer, but crash diets and extreme workouts can do more harm than good. Ragi is a metabolism-boosting grain that naturally aids weight loss. The high fibre content keeps you full for longer, curbing unnecessary cravings. Unlike processed snacks that leave you feeling guilty, ragi meals provide lasting satiety without packing on the calories.

  1. A Digestive Super food for Hot Weather

Digestive issues like bloating, acidity, and indigestion are common in summer due to excessive heat and improper eating habits. Ragi is naturally gluten-free, alkaline, and easy on the stomach, making it perfect for those with sensitive digestion. It promotes gut health, prevents constipation, and ensures smooth digestion—keeping you light and comfortable even in the scorching heat by these Ragi Benefits in Summer.

  1. Packed with Calcium and Bone-Strengthening Nutrients

Summer often leads to increased physical activity, whether it’s outdoor sports, travel, or workouts. Strong bones are essential to keep up with these activities, and ragi is one of the best plant-based sources of calcium. A daily serving of ragi strengthens bones, prevents osteoporosis, and ensures overall skeletal health—without the need for dairy.

  1. Regulates Blood Sugar Levels

High temperatures can sometimes lead to fluctuating blood sugar levels, especially for diabetics. Ragi is a low glycaemic index grain that prevents sudden sugar spikes, making it an excellent choice for managing diabetes in summer. Its slow-digesting properties help in maintaining stable glucose levels, keeping you active and free from energy crashes.

  1. A Natural Skin Detoxifier for Glowing Skin

Summer heat often leads to dull, acne-prone skin due to excessive sweating and toxin buildup. Ragi is rich in antioxidants and amino acids that help flush out toxins, keeping your skin fresh and glowing. It also combats premature aging, thanks to its collagen-boosting properties. Including ragi in your diet can naturally enhance skin radiance and prevent summer-related skin issues by Ragi Benefits in Summer.

  1. Strengthens Immunity to Fight Seasonal Illnesses

Summer brings its share of infections, from heat strokes to digestive ailments. Ragi is loaded with essential nutrients like iron, magnesium, and vitamins that boost immunity. Regular consumption helps in warding off seasonal illnesses, ensuring you stay strong and healthy all summer long.

  1. Versatile and Delicious for Every Summer Meal

The best part about ragi? Its versatility! From refreshing ragi buttermilk to cooling ragi porridge, from energy-packed ragi laddies to hydrating ragi smoothies, the options are endless. It seamlessly fits into breakfast, lunch, or snacks, offering both nutrition and taste. Below some recipes will help to avail Ragi Benefits in Summer.

Refreshing Ragi Drinks & Recipes for Summer
  1. Ragi Buttermilk (Ragi Mojige)

Ingredients:

  • 2 tbsp ragi flour
  • 1 cup buttermilk
  • 1/2 tsp cumin powder
  • A pinch of salt
  • Fresh coriander leaves (optional)
    Method:
  1. Mix ragi flour with a little water to form a smooth paste.
  2. Add this paste to buttermilk, stirring continuously.
  3. Add cumin powder, salt, and mix well.
  4. Serve chilled with fresh coriander leaves for added flavor.
  1. Ragi Coconut Smoothie

Ingredients:

  • 2 tbsp ragi flour
  • 1/2 cup coconut milk
  • 1 banana
  • 1 tbsp honey
  • Ice cubes
    Method:
  1. Cook ragi flour in a little water to form a smooth porridge.
  2. Blend it with coconut milk, banana, and honey until smooth.
  3. Add ice cubes and serve chilled.
  1. Ragi Summer Porridge

Ingredients:

  • 3 tbsp ragi flour
  • 1 cup cold milk or almond milk
  • 1 tbsp jaggery or honey
  • 1/2 tsp cardamom powder
    Method:
  1. Cook ragi flour in water, stirring continuously to avoid lumps.
  2. Let it cool and add cold milk, jaggery, and cardamom powder.
  3. Mix well and serve chilled.
  1. Ragi Lemonade

Ingredients:

  • 2 tbsp ragi flour
  • 1 glass cold water
  • Juice of 1 lemon
  • 1 tbsp honey
  • Ice cubes
    Method:
  1. Mix ragi flour with water and cook for a few minutes.
  2. Let it cool, then add lemon juice and honey.
  3. Stir well and serve with ice cubes.
Conclusion

This summer, ditch the unhealthy cooling drinks and calorie-laden foods. Embrace ragi—nature’s gift for a healthier, cooler, and more energetic season. Whether you want to stay hydrated, manage weight, boost energy, or enhance your skin’s glow, ragi is the answer. Make it a staple in your diet and experience the difference in your overall health and well-being by Ragi Benefits in Summer.

Don’t just survive summer—thrive with ragi!


How to Lift Your Drooping Eyes? Brighten & Rejuvenate Them Naturally!

✨ How to Lift Your Drooping Eyes? Brighten & Rejuvenate Them Naturally!

Drooping eyes, also known as hooded or sagging eyelids, can make you look tired, older, or even impact your vision. Whether it’s due to aging, fatigue, genetics, or lifestyle habits, sagging eyelids don’t have to be a permanent issue. With the right care, exercises, and treatments, you can lift and brighten your eyes naturally while maintaining a youthful and refreshed look. Solutions are here for How to Lift Your Drooping Eyes.

If you’ve been wondering how to fix drooping eyes without surgery or harsh treatments, this guide will give you the most effective strategies to combat sagging eyelids and restore their firmness.

🧐 1. Why Do Eyelids Droop? Understanding the Root Cause

Before you jump into solutions, it’s essential to understand why your eyelids are sagging in the first place. Drooping eyes can be caused by:

🔹 Aging & Loss of Collagen

As we age, the skin loses collagen and elasticity, making eyelids sag over time.

🔹 Fatigue & Stress

Lack of sleep and excessive screen time can weaken the skin around the eyes, causing it to look puffy and droopy.

🔹 Dehydration & Poor Nutrition

When your body lacks essential nutrients and hydration, the delicate eye area suffers the most.

🔹 Genetics

Some people naturally have hooded eyes or drooping eyelids due to hereditary factors.

🔹 Weak Eye Muscles

Muscle weakness around the eyes can cause the upper eyelid to sag, making eyes look heavy and tired.

🏋️‍♀️ 2. Eyelid Exercises: Natural Lifting Without Surgery

Just like you work out to tone your body, your eyelids need their own set of exercises to stay firm and lifted. How to Lift Your Drooping Eyes:-

🔸 Eyelid Resistance Lift

  • Close your eyes gently.
  • Place your fingertips on your eyebrows and try to lift them while keeping your eyes closed.
  • Hold for 5-10 seconds and repeat 10 times.

🔸 Eye Stretching Workout

  • Raise your eyebrows as high as possible while keeping your eyes wide open.
  • Hold for 10 seconds and repeat 10-15 times daily.

🔸 Blink & Squeeze Method

  • Close your eyes tightly for 3 seconds, then open them wide.
  • Repeat 10 times to strengthen eye muscles.

These simple workouts can help tone your eyelids, making them look naturally lifted over time.


🍃 3. Home Remedies to How to Lift Drooping Eyes

🔹 Cold Cucumber Therapy

Cucumbers are packed with antioxidants and hydration to refresh tired eyes.

  • Place chilled cucumber slices over your eyelids for 10-15 minutes daily to reduce sagging.

🔹 Egg White Eye Mask

Egg whites tighten the skin instantly, making them a powerful remedy for droopy eyelids.

  • Apply a thin layer of egg white over your eyelids, let it dry for 10 minutes, then rinse off.

🔹 Aloe Vera Magic

Aloe Vera’s hydrating and skin-tightening properties help lift sagging skin.

  • Apply fresh aloe vera gel around your eyes and leave it on for 15 minutes before rinsing.

🔹 Green Tea Compress

Rich in antioxidants, green tea reduces puffiness and firms up the skin.

  • Dip cotton pads in chilled green tea and place them over your eyes for 10 minutes.

🔹 Hydration & Proper Sleep

Dehydration and lack of sleep make drooping eyelids worse.

  • Drink plenty of water and ensure you sleep at least 7-8 hours every night.
💆 4. Facial Massages & Lymphatic Drainage for Instant Lift

Massaging your face, especially around the eyes, boosts circulation and reduces sagging.

🔸 Eye Massage Technique

  • Gently tap around your eyes using your ring finger to stimulate blood flow.
  • Use upward strokes with a light moisturizer or eye serum to lift the skin.

🔸 Gua Sha & Jade Roller Therapy

  • These tools help improve lymphatic drainage and reduce puffiness.
  • Use them daily in an upward motion for a visible lift.
🌿 5. Skincare Tips to Keep Your Eyelids Firm & Healthy

🔹 Invest in an Eye Cream with Retinol & Peptides

Retinol boosts collagen, while peptides strengthen skin elasticity.

🔹 Always Use Sunscreen on Eyelids

Sun exposure can break down collagen and accelerate sagging.

🔹 Stay Away from Harsh Rubbing

Avoid rubbing your eyes aggressively, as it can weaken the delicate skin.

🔹 Keep Your Eye Area Hydrated

Use hyaluronic acid-based creams to keep your eyelids firm and plump.

⚡ 6. When to Consider Medical Treatments?

How to Lift Your Drooping Eyes with Medication: If your drooping eyelids severely impact your vision or confidence, medical treatments might be an option.

🔹 Botox for a Temporary Lift

  • Botox injections relax certain muscles and create a lifting effect for a few months.

🔹 Plasma Fibroblast Therapy

  • A non-surgical treatment that tightens eyelid skin by stimulating collagen production.

🔹 Blepharoplasty (Eyelid Surgery)

  • If your droopy eyelids obstruct your vision, a minor surgical procedure can remove excess skin.
🌟 7. Lifestyle Changes to Prevent Eyelid Drooping

🔸 Quit Smoking & Reduce Alcohol Consumption

Both can weaken collagen, accelerating sagging.

🔸 Maintain a Collagen-Rich Diet

Include foods like bone broth, berries, citrus fruits, and leafy greens to keep your skin firm.

🔸 Reduce Screen Time & Take Eye Breaks

Excessive screen exposure strains your eyes, leading to tired, droopy lids.

🔸 Sleep with Your Head Elevated

This prevents fluid retention and puffiness around the eyes.


🎯 Say Goodbye to Drooping Eyes Naturally!

How to Lift Your Drooping Eyes: Drooping eyelids may seem like an inevitable issue, but the right combination of exercises, home remedies, massages, skincare, and lifestyle changes can significantly lift and brighten your eyes. You don’t have to resort to surgery or expensive treatments—start with natural techniques and see the transformation for yourself.

The secret to youthful, lifted eyes lies in consistency. Adopt these methods into your daily routine and watch your drooping eyelids turn into firm, refreshed, and radiant eyes. 💖

Kitchen Chic: How to Label Your Kitchen Essentials Attractively and Stay Organized!

Kitchen Chic: How to Label Your Kitchen Essentials Attractively and Stay Organized! 🏠

A well-organized kitchen isn’t just about neat cabinets and tidy countertops—it’s about creating a space where everything has a home, and nothing disrupts the cooking flow. Attractive labeling plays a massive role in achieving this goal, adding both function and flair to your kitchen. From spices to pantry staples, the right labeling can transform your kitchen into a harmonious and efficient space. Let’s dive into how you can label your kitchen essentials in a way that is not only practical but also visually stunning.

🧂 1. Why Labeling Matters: More Than Just a Pretty Touch

Labeling isn’t just about aesthetics; it offers practical benefits that make your kitchen life so much easier by Label Your Kitchen Essentials.

The Benefits of Kitchen Labeling:
  • Eliminates Guesswork: No more mistaking salt for sugar! Clear labels to Label Your Kitchen Essentials ensure you grab the right ingredient every time.
  • Enhances Organization: Categorize and arrange items logically, reducing clutter.
  • Speeds Up Cooking: Knowing exactly where everything is cuts down on prep time.
  • Adds Style: Labels can complement your kitchen decor, adding a personalized touch.
🎨 2. Get Creative: Different Labeling Styles for Different Needs

When it comes to labeling, there’s no one-size-fits-all approach. The best method depends on your kitchen’s style, your storage containers, and your personal taste.

Chalkboard Labels:
  • Best For: Jars, spice containers, and pantry bins.
  • Style: Rustic and versatile—perfect for farmhouse or boho kitchens.
  • Pro Tip: Use waterproof chalk markers to prevent smudging.
Clear and Minimalist Labels:
  • Best For: Transparent containers where you want the contents to shine through.
  • Style: Modern, clean, and sleek. Ideal for minimalist kitchens.
  • Pro Tip: Use simple fonts and keep labels uniform for a streamlined look.

Vinyl Decals:
  • Best For: Large containers, drawers, and even kitchen cabinets.
  • Style: Customizable and available in a variety of fonts and colors.
  • Pro Tip: Choose decals that contrast with the container’s color to enhance readability.
Handwritten Labels:
  • Best For: A personal touch on homemade goods, gift jars, or specialty items.
  • Style: Adds charm and warmth to your kitchen.
  • Pro Tip: Use quality label paper and permanent ink to maintain a neat appearance.
🥫 3. Labeling Pantry Essentials: Make Your Storage Pinterest-Worthy!

A well-labeled pantry not only looks incredible but also prevents food waste and overbuying.

Start with Clear Containers:
  • Transfer pantry staples like grains, pasta, and snacks into transparent, airtight containers. This keeps food fresh and allows you to see when you’re running low.

Use Uniform Labels:
  • Maintain consistency by using the same label type and style throughout the pantry to Label Your Kitchen Essentials.
  • Include both the product name and expiration date for easy access.
Group by Category:
  • Organize items into categories such as baking supplies, snacks, breakfast items, and label the shelves or baskets accordingly.
Add Extra Information:
  • If you buy in bulk, add cooking instructions or measurement conversions directly on the label.
🍽️ 4. Spice Things Up: Labeling Your Spice Jars Like a Pro

A well-labeled spice rack is a game-changer for any home chef.

Choose the Right Containers:
  • Opt for identical spice jars with transparent or glass designs. Uniformity is key to a professional look.
Arrange Alphabetically:
  • Label jars clearly with spice names, and arrange them in alphabetical order for quick access.
Color-Code for Cuisines:
  • If you love cooking international dishes, color-code labels by cuisine (e.g., green for Italian, red for Indian) to add a creative twist.
🥄 5. Drawers and Cabinets: Make Hidden Spaces Organized and Accessible

Out of sight shouldn’t mean out of order! Labeling drawers and cabinets can make a huge difference.

Drawer Labels:
  • Use simple labels to indicate the contents of each drawer, such as ‘Cutlery,’ ‘Utensils,’ or ‘Baking Tools.’
  • Stick labels on the outside or use transparent inserts within the drawer for a subtle approach.
Cabinet Door Labels:
  • Apply labels on the inside of cabinet doors to identify where each item belongs, making it easier for the entire household to maintain order.
Use Icon Labels for Kids:
  • If you have children, use icons along with text labels to help them learn where things go. This encourages tidiness and independence.
🧴 6. Don’t Forget the Fridge: Labeling for Freshness and Efficiency

The fridge is often overlooked in kitchen organization, but labeling here can save you time and money.

Designate Zones:
  • Create zones for produce, dairy, snacks, and leftovers. Label shelves or bins accordingly.
Add Dates to Labels:
  • When storing leftovers or meal-prepped items, include the date it was made to avoid confusion and reduce food waste.
Use Washable Labels:
  • For containers that frequently change contents, use dry-erase labels or reusable sticker labels.

✨ 7. Make It Attractive: Adding Style to Your Kitchen Labels

Aesthetics matter! Here’s how to make your labels part of your kitchen’s decor:

Play with Fonts and Colors:
  • Match label fonts and colors to your kitchen’s design theme—whether it’s rustic, modern, vintage, or eclectic.
Add Decorative Elements:
  • Use borders, icons, or small illustrations on your labels to enhance their appearance.
Incorporate a Theme:
  • Choose a theme, like vintage apothecary or modern minimalist, and stick with it throughout your kitchen.
🎯 8. Quick Tips for Maintaining Your Labeled Kitchen
  • Update Labels Regularly: As contents change, refresh your labels to avoid confusion.
  • Clean Containers Before Relabeling: Remove old labels completely to maintain a polished look.
  • Label Everything: From pantry items to cleaning supplies—consistency is key.
🏆 Labeling for Beauty and Functionality

Labeling your kitchen essentials is more than just a practical step—it’s an art form. With the right labels, you can transform your kitchen into an organized, visually pleasing space where cooking becomes a joy, not a chore. Whether you prefer a vintage, rustic vibe or a clean, modern look, there’s a labeling method to match your style and elevate your kitchen’s aesthetic. So go for Label Your Kitchen Essentials now.

So, grab those labels, get creative, and watch your kitchen transform into the most organized (and attractive) room in your home!

You may also like to read…

Bathroom Bliss: How to Organize Bathroom Like a Pro (and Make It Look Gorgeous!)

Bathroom Bliss: How to Organize Bathroom Like a Pro (and Make It Look Gorgeous!)🛁

A cluttered bathroom can turn your morning routine into a stressful experience. Imagine reaching for your favorite face wash and knocking over a cascade of bottles—annoying, right? The truth is, organizing your bathroom isn’t just about cleanliness; it’s about creating a serene, spa-like atmosphere that welcomes you every time you step in. Here’s how you can transform your bathroom into a well-organized, aesthetically pleasing space without breaking the bank.

🧼 1. Start with a Blank Slate: Declutter Like You Mean It!

While talking about How to Organize Bathroom, the first step to organizing any space is decluttering, and your bathroom is no exception. The more you hold onto half-used products and expired toiletries, the harder it becomes to achieve that clean, attractive look.

Decluttering Tips:
  • Empty Everything: Take out every item from your cabinets, shelves, and shower area.
  • Sort Ruthlessly: Group items into categories—keep, toss, donate. If you haven’t used a product in the last three months, it’s time to let it go.
  • Check Expiry Dates: Many beauty and skincare products have a shelf life. Toss anything that’s past its prime.

Pro Tip:

Use transparent bins or baskets while sorting. This not only keeps things organized but also allows you to see everything at a glance.

🚿 2. Maximize Storage Space: Smart Solutions for Small Bathrooms

Whether your bathroom is spacious or cozy, smart storage is key to maintaining order. Here are some creative ideas to make the most of every inch:

Use Vertical Space:

  • Install floating shelves above the toilet or next to the vanity for extra storage.
  • Hang towel racks or hooks on the back of the door to save cabinet space.

Drawer Dividers Are Your Best Friend:

  • Organize makeup, grooming tools, and smaller items with adjustable dividers. This keeps everything in place and prevents clutter.

Think Outside the Box:

  • Use a bar cart as a mobile storage unit. It can hold towels, toiletries, and even add a touch of elegance to your bathroom.
  • Add magnetic strips inside cabinet doors to hold metal grooming tools like tweezers and nail clippers.
🌿 3. Create a Designated Place for Everything

The secret to organize bathroom is ensuring that every item has a dedicated spot. This not only makes the space look tidy but also makes it easier to maintain.

Set Zones in Your Bathroom:

  • Shower Area: Only keep necessary items like shampoo, conditioner, and body wash. Use a corner caddy or a hanging organizer.
  • Vanity Zone: Use trays to keep your daily skincare and beauty products organized. Small jars can hold cotton pads, earbuds, and hair ties.
  • Under the Sink: Utilize stackable drawers or baskets to store cleaning supplies, extra toiletries, and backup products.

Labeling Works Wonders:

  • Invest in cute labels or a label maker to ensure everyone in the house knows where things belong.
🧴 4. Style Meets Function: Choose Attractive Storage Solutions

Organizing doesn’t mean sacrificing style. With the right storage solutions, you can keep your bathroom neat while enhancing its aesthetic appeal.

Baskets and Bins:
  • Opt for woven baskets or clear acrylic bins that match your bathroom’s decor. They keep things organized while looking chic.
Glass Jars and Containers:
  • Use glass jars for bath salts, cotton balls, and soap bars. They add a spa-like feel to your bathroom.
Decorative Trays:
  • Place a decorative tray on your vanity to hold perfumes, lotions, and small accessories. It adds a polished look and keeps things tidy.
🕯️ 5. Add Finishing Touches: Make It Inviting

Once everything is organized, it’s time to add those finishing touches that elevate your bathroom’s ambiance.

Incorporate Greenery:

  • Add a small potted plant or a vase of fresh flowers. It brings a refreshing vibe and a pop of color.

Introduce Soft Textiles:

  • Use plush towels, a cozy bath mat, and soft robes to create a comforting atmosphere. Roll up extra towels and store them in a basket for a hotel-like feel.

Embrace Scent and Lighting:

  • Light a scented candle or use a diffuser with essential oils to make your bathroom smell heavenly.
  • Install soft lighting or add a small lamp to create a warm, relaxing glow.
💡 Bonus Tips: Maintaining Bathroom Organization Long-Term
  • Adopt a One-In, One-Out Rule: When you buy a new product, get rid of an old or unused one.
  • Quick Daily Reset: Spend a minute each day putting items back in their designated spots.
  • Weekly Clean-Up: Wipe down surfaces, empty the trash, and do a quick inventory check to avoid clutter buildup.

🚀 Your Dream Bathroom Awaits!

Organize bathroom attractively is not just about tidiness; it’s about creating a sanctuary where you can unwind and recharge. With smart storage solutions, a touch of style, and a commitment to maintaining order, you can turn even the smallest bathroom into a beautiful, functional space by these Organize Bathroom Tips.

So, roll up your sleeves, start decluttering, and transform your bathroom into the blissful retreat you deserve!


Is Sprouts Salad the Morning Boost You Need? Rise and Shine

Is Sprouts Salad the Morning Boost You Need? Rise and Shine🥗

When it comes to healthy eating, mornings set the tone for the entire day. What you choose for breakfast can either fuel your energy or leave you sluggish by noon. Among the myriads of breakfasts options, sprouts salad often pops up as a contender for the ultimate morning meal. But is it really a good idea to kick start your day with a bowl of fresh, crunchy sprouts? Let’s dive deep into why sprouts salad might just be the breakfast game-changer you’ve been searching for.

🌱 Why Sprouts Salad in the Morning? The Nutritional Knockout!

Sprouts are essentially seeds that have begun to germinate, and this simple process significantly amplifies their nutritional value. When you start your morning with sprouts salad, you’re not just eating raw vegetables—you’re fuelling your body with a powerhouse of nutrients.

What Makes Sprouts a Morning Hero?

  • Packed with Protein: Sprouts, especially those from lentils, chickpeas, and beans, are a rich source of plant-based protein. A protein-packed breakfast helps stabilize blood sugar levels and keeps hunger at bay.
  • Vitamin Burst: Sprouts are loaded with vitamins A, C, K, and essential B vitamins, giving your immune system a morning boost.
  • Digestive Health: The high fiber content in sprouts aids digestion, ensuring a smooth start to your day.
  • Enzyme-Rich: Sprouting increases the enzyme content in seeds, which supports gut health and enhances nutrient absorption.

⏰ Morning vs. Other Meals: When Is the Best Time to Eat Sprouts Salad?

While sprouts can be enjoyed at any time of the day, having them in the morning comes with its own set of advantages.

Why Morning Is Ideal:

  1. Energizing Start: The complex carbohydrates in sprouts provide sustained energy, keeping you active through your morning tasks.
  2. Boosts Metabolism: A nutrient-dense breakfast jump starts your metabolism, aiding in weight management.
  3. Light and Refreshing: Unlike heavy breakfasts, a sprouts salad is light yet fulfilling, preventing that mid-morning slump.
  4. Preps Your Gut: The fiber and enzymes in sprouts promote gut health, setting a positive tone for your digestive system all day long.

💪 The Health Benefits of a Sprouts Salad Breakfast

Incorporating sprouts salad into your morning routine can bring about noticeable health benefits:

  1. Aids in Weight Management

Sprouts are low in calories and high in fiber. A bowl of sprouts salad can make you feel full, reducing the urge to snack on unhealthy foods before lunch.

  1. Supports Immune Function

The vitamins and antioxidants in sprouts help strengthen your immune system, keeping common illnesses at bay.

  1. Enhances Skin and Hair Health

The high content of vitamins A and C in sprouts contributes to glowing skin and healthy hair.

  1. Boosts Heart Health

Sprouts are known to reduce bad cholesterol levels, promoting better cardiovascular health.

🛠️ How to Prepare the Perfect Morning Sprouts Salad

The beauty of a sprout’s salad lies in its versatility. You can mix and match ingredients to suit your taste and nutritional needs.

Ingredients:

  • 1 cup mixed sprouts (mung beans, chickpeas, lentils)
  • 1 small cucumber, chopped
  • 1 small tomato, diced
  • 1 small onion, finely chopped
  • A handful of pomegranate seeds (for a sweet crunch)
  • Fresh coriander leaves, chopped
  • Juice of half a lemon
  • Salt, pepper, and a pinch of chaat masala for flavor

Instructions:

  1. Rinse the Sprouts: Ensure your sprouts are clean and fresh.
  2. Mix the Vegetables: Combine cucumber, tomato, and onion with the sprouts.
  3. Add Pomegranate Seeds: These add a burst of flavor and antioxidants.
  4. Season Well: Add salt, pepper, and chaat masala.
  5. Finish with Lemon Juice: A squeeze of lemon adds freshness and helps in iron absorption.

🚦 Avoid These Mistakes When Eating Sprouts in the Morning

While sprouts salad is a great option, a few missteps could reduce its benefits:

  1. Avoid Overeating:

While healthy, eating too many sprouts can lead to bloating and discomfort. Stick to a moderate portion.

  1. Don’t Eat Raw Sprouts if You Have a Sensitive Stomach:

If raw sprouts are hard to digest, lightly steam or blanch them to reduce the risk of stomach upset.

  1. Maintain Hygiene:

Improperly washed sprouts can harbor bacteria. Always wash thoroughly and buy from a trusted source.

🌈 Sprouts Salad Variations to Keep Breakfast Interesting

Eating the same salad every day can get monotonous. Here are some variations to keep your taste buds excited:

  1. Mediterranean Sprouts Salad:

Add olives, feta cheese, and a drizzle of olive oil for a fresh twist.

  1. Desi Tadka Sprouts Salad:

Give your sprouts a quick stir-fry with mustard seeds, curry leaves, and a dash of turmeric for an Indian touch.

  1. Fruit and Sprouts Fusion:

Mix sprouts with diced apples, grapes, and a sprinkle of nuts for a sweet and crunchy experience.

✨ Final Verdict: Should You Eat Sprouts Salad in the Morning?

Is Sprouts Salad the Morning Boost You Need? Absolutely! Sprouts salad in the morning is not just good—it’s brilliant. It’s a powerful combination of taste, health, and convenience. Whether you are looking to lose weight, improve digestion, or simply start your day on a healthy note, a sprouts salad offers all that and more.

Make sprouts salad a part of your morning ritual and witness the transformation in your energy levels and overall health. It’s not just a meal; it’s a lifestyle choice that brings you one step closer to a healthier, happier you!

Parenting Like a Pro: What Makes the Indian Way Unbeatable?

Parenting Like a Pro: What Makes the Indian Way Unbeatable?

Parenting is universal, yet every culture brings its own unique flavor to raising children. Indian parenting, in particular, stands out for its remarkable blend of tradition, discipline, and boundless love. In a world where parenting styles are continually evolving, Indian parenting offers timeless principles that nurture not only successful individuals but also compassionate human beings. Here’s why Indian parenting is often considered the gold standard.

🌳 1. Family First: The Pillar of Indian Parenting

In Indian households, family isn’t just important—it’s everything. Children grow up surrounded by parents, grandparents, uncles, aunts, and cousins, fostering a deep sense of belonging and security.

How This Benefits Children:

  • Emotional Stability: Having multiple caregivers ensures that children always feel loved and supported.
  • Learning from Generations: Kids absorb wisdom and life lessons from elders, giving them a broader perspective on life.
  • Value of Relationships: Growing up in a large family teaches children how to build and maintain relationships, a skill that serves them well in adulthood.
🎓 2. Education as a Priority: Building a Strong Foundation

Indian parents are renowned for their emphasis on education. They believe that education is not just a pathway to a career but a foundation for a well-rounded life. It helps them Parenting Like a Pro.

The Indian Approach to Education:

  • Early Encouragement: From a young age, children are introduced to books, puzzles, and educational games.
  • Supportive Learning Environment: Parents invest in tutoring, extracurricular activities, and skill development.
  • Discipline and Dedication: Indian parenting promotes consistent study habits and a disciplined approach to academics.

The result? Indian children often excel academically and develop a lifelong love for learning.

🌏 3. The Art of Balancing Tradition and Modernity

To Parenting Like a Pro, Indian parents have mastered the delicate act of preserving cultural traditions while embracing modern values. This balance helps children stay rooted while being open-minded.

What This Looks Like:

  • Celebrating Festivals: Kids learn about their heritage through vibrant celebrations of Diwali, Holi, Eid, and more.
  • Respecting Elders: Indian parenting emphasizes humility and respect, qualities that shine in personal and professional interactions.
  • Adapting to Change: While traditions are honored, Indian parents also encourage kids to explore new ideas, technologies, and global opportunities.
💪 4. Teaching Resilience Through Real-Life Lessons

Indian parents don’t believe in shielding their children from life’s challenges. Instead, they prepare them to face difficulties with strength and resilience.

Practical Life Lessons:

  • Handling Failure: Children are taught that failure is a stepping stone to success.
  • Financial Awareness: Many Indian kids learn budgeting and saving from a young age, fostering financial responsibility.
  • Independence: While support is abundant, kids are encouraged to make decisions and learn from their experiences.
🍛 5. The Power of Shared Meals and Storytelling

Indian households often revolve around the dining table. Mealtime is not just about nourishment but also about bonding and sharing stories.

How This Shapes Children:

  • Healthy Eating Habits: Home-cooked meals ensure children get balanced nutrition.
  • Life Lessons: During meals, parents and elders share stories and insights, teaching values and ethics.
  • Open Communication: These informal settings encourage kids to express themselves openly and build trust with their families.
🚦 6. Discipline with a Purpose: Setting Boundaries and Expectations

Indian parenting involves setting clear boundaries and expectations, promoting discipline and responsibility. However, discipline is often balanced with love and guidance.

The Indian Discipline Style:

  • Structure and Routine: Children thrive in a structured environment that includes study time, playtime, and family time.
  • Understanding Consequences: Instead of mere punishment, Indian parents focus on helping kids understand the consequences of their actions.
  • Guidance, Not Control: While Indian parents’ guide their children, they also allow them to learn from their mistakes.
💖 7. Unconditional Love and Lifelong Support

Perhaps the most defining feature of Indian parenting is the unwavering, unconditional love. Indian parents are known to support their children not just during childhood but throughout their lives.

This Translates Into:

  • Being a Safety Net: Whether it’s emotional support or financial help, Indian parents are always ready to stand by their kids.
  • Celebrating Achievements: Indian parents take immense pride in their children’s successes, big or small.
  • Building Confidence: With a strong support system, children grow up with a sense of security and confidence.
🌟 Final Thoughts: The Indian Parenting Legacy

Indian parenting is not about creating perfect children—it’s about nurturing resilient, compassionate, and well-rounded individuals & it enables them to Parenting Like a Pro. The unique blend of tradition, discipline, education, and unconditional love creates a nurturing environment where children thrive.

In a fast-paced, ever-changing world, the timeless principles of Indian parenting continue to shine & make them Parenting Like a Pro, offering a blueprint for raising strong, successful, and grounded human beings. Whether you are a parent or aspiring to be one, there’s much to learn from the Indian way of raising kids—where love, values, and wisdom are passed down through generations, creating a legacy that lasts a lifetime.

Beat That Headache Fast: Quick Home Remedies That Actually Work!

Beat That Headache Fast: Quick Home Remedies That Actually Work!

A headache can strike at the most inconvenient times, turning even the simplest tasks into unbearable challenges. Instead of reaching for over-the-counter pills, why not try powerful, natural remedies to Beat That Headache Fast to the curb? These quick and effective home solutions not only provide relief but also support your overall well-being. Say goodbye to headaches with these assertive and unique strategies!

🧠 Understanding Headaches: What Triggers Them?

Before diving into remedies, it’s crucial to understand why headaches happen. Common triggers include:

  • Dehydration
  • Stress and anxiety
  • Poor posture
  • Eye strain
  • Lack of sleep
  • Hunger or low blood sugar

Identifying your trigger can help you choose the most effective remedy and prevent future headaches.

💧 1. Hydration Power: Water with a Twist

Dehydration is a top culprit for headaches, but plain water isn’t always enough. Boost its effectiveness by adding a pinch of pink Himalayan salt and a squeeze of lemon. The salt restores electrolytes, while lemon provides vitamin C and refreshes the senses.

Quick Remedy:

  • Mix a glass of water with a pinch of pink salt and fresh lemon juice.
  • Sip slowly to re-hydrate and rebalance.
🌿 2. Essential Oils: Nature’s Instant Relief

Essential oils like peppermint and lavender are game-changers for headaches. Peppermint oil has a cooling effect, while lavender promotes relaxation.

How to Use:

  • Mix a few drops of peppermint oil with a carrier oil (like coconut oil) and massage it onto your temples and the back of your neck.
  • For lavender, inhale the aroma or add a few drops to a warm bath.
🧊 3. Cold Compress: Numb the Pain Away

A cold compress constricts blood vessels, reducing headache intensity, especially for migraines.

How to Make a Cold Compress:

  • Wrap ice cubes in a clean cloth and press gently on your forehead or the base of your skull for 10-15 minutes.
  • Alternatively, use a bag of frozen peas for an adaptable compress.
🍵 4. Herbal Teas: Soothe from the Inside

Herbal teas aren’t just comforting—they also offer to Beat That Headache Fast. Try:

  • Ginger Tea: Reduces inflammation and soothes nausea, often associated with migraines.
  • Chamomile Tea: Calms the mind and alleviates tension headaches.
  • Fever few Tea: Known for reducing migraine frequency and severity.

Pro Tip: Add a teaspoon of honey for added therapeutic benefits.

🌬️ 5. Deep Breathing and Relaxation Techniques

Headaches caused by stress and tension respond well to deep breathing exercises. This method enhances oxygen flow to the brain and promotes relaxation.

Try This Simple Technique:

  • Sit comfortably, inhale deeply for 4 seconds, hold for 7 seconds, and exhale slowly for 8 seconds.
  • Repeat 5-10 times or until you feel more relaxed.
👃 6. Steam Inhalation: Clear the Sinuses

For sinus-related headaches, steam inhalation is incredibly effective. It helps to open nasal passages and reduce pressure in the sinuses.

How to Do It:

  • Boil water and pour it into a large bowl.
  • Add a few drops of eucalyptus or peppermint oil.
  • Cover your head with a towel and inhale the steam for 5-10 minutes.
🍫 7. Snack Smart: A Quick Fix for Hunger Headaches

Sometimes, headaches are your body’s way of signalling low blood sugar. Eating a quick, healthy snack can provide fast relief.

Best Snacks for Headache Relief:

  • Almonds: Rich in magnesium, which helps relax blood vessels.
  • Dark Chocolate: Contains caffeine and magnesium, offering quick relief for tension headaches.
  • Bananas: Packed with potassium, they support hydration and muscle function.
🧘 8. Stretch It Out: Release Tension

If you’ve been sitting at a desk all day, muscle tension could be causing your headache. Simple stretches can improve blood flow and reduce discomfort and help to Beat That Headache Fast.

Try These Moves:

  • Neck Stretches: Tilt your head to each side, holding for 15-30 seconds.
  • Shoulder Shrugs: Raise your shoulders towards your ears, hold, and release.
  • Forward Bend: Stand up, bend forward, and let your head hang to improve blood circulation.
🍀 9. Spice It Up with Cloves

Cloves have pain-relieving properties, especially beneficial for tension headaches.

Quick Remedy:

  • Crush a few cloves and place them in a sachet. Inhale the aroma when a headache strikes.
  • Alternatively, add a few drops of clove oil to a carrier oil and massage it onto your forehead.
🚫 10. Avoid Common Headache Triggers

While remedies provide relief, prevention is even more powerful. Avoid common triggers such as:

  • Excessive screen time without breaks
  • Skipping meals or not staying hydrated
  • Too much caffeine or sudden withdrawal from it
  • Poor sleep hygiene
💪 Take Charge of Your Headache: Final Thoughts

When a headache hits, it’s easy to feel defeated. But with these powerful home remedies to Beat That Headache Fast, you can take control of the pain naturally and quickly. Experiment with these solutions to find what works best for you, and keep them in your wellness toolkit for the next time a headache strikes.

Stop letting headaches hold you back—take action, embrace natural remedies, and reclaim your day!

You may also like to read…

When to Water Your Plants for Explosive Growth: Unlocking the Secret!

When to Water Your Plants for Explosive Growth: Unlocking the Secret!

Watering plants might seem like a no-brainer, but when you do it matters as much as how much water you give. If you’ve been mindlessly watering your plants whenever you remember, it’s time to get strategic. The timing of watering can make the difference between lush, thriving greenery and sad, drooping leaves. Ready to transform your garden? Here’s how to do it right.

🌱 Why Timing Matters in Watering Plants

You might wonder, “Does it really matter when I water my plants?” Absolutely. Plants, like all living things, have biological rhythms. Their ability to absorb water, manage sunlight, and thrive depends on the synchronization of watering with these natural cycles.

Watering at the wrong time can lead to:

  • Wasted Water: Poor absorption or evaporation
  • Plant Stress: Inconsistent hydration can shock the roots
  • Disease Risks: Excess moisture at night can encourage mold and fungi

By choosing the right time to water, you can enhance root absorption, support photosynthesis, and boost overall plant health. That’s why it is important to know When to Water Your Plants.

🌤️ Morning Glory: The Best Time to Water Plants

The golden rule of watering is to do it in the early morning. Here’s why:

  1. Cooler Temperatures = Less Evaporation

Watering before the sun fully rises ensures that the moisture goes straight to the roots, not into the air. The cool morning air allows the soil to soak up every drop.

  1. Prepares Plants for the Day Ahead

Morning watering gives plants a hydration boost, helping them withstand the heat and sun exposure. This is particularly crucial for sun-loving species and during hot seasons.

  1. Reduces Disease Risk

By watering early, leaves and stems dry off quickly with the morning sun, reducing the risk of fungal infections and rot.

🌅 Evening Watering: When and Why It Works

If mornings are impossible, early evening is your next best option. However, there are critical guidelines to follow:

  1. Avoid Late Night Watering

Watering too late means water sits on the leaves and soil overnight, creating a damp environment perfect for pests and diseases.

  1. Focus on Soil, Not Leaves

When watering in the evening, aim the water at the base of the plant. Wet leaves in the dark are a breeding ground for issues.

  1. Allow Time to Absorb

Water early enough in the evening to let the soil absorb the moisture before the temperature drops.

🚫 When NOT to Water: The Midday Mistake

Watering during the middle of the day is the worst choice. The sun is at its peak, causing water to evaporate quickly and reducing the amount that reaches the roots. Additionally, droplets on leaves can act like magnifying glasses, potentially scorching the foliage. To avoid these silly mistakes you have to know When to Water Your Plants.

💧 The Art of Efficient Watering

Timing is critical, but technique matters too. Here’s how to make every drop count:

  1. Water Deeply, Not Frequently

Shallow watering encourages shallow roots. Instead, soak the soil thoroughly but less often. This promotes deeper, stronger root systems.

  1. Use the Right Tools

A soaker hose or drip irrigation system delivers water directly to the soil, minimizing waste and keeping foliage dry.

  1. Monitor Moisture Levels

Stick your finger an inch into the soil. If it feels dry, it’s time to water. Over watering is as dangerous as under watering.

  1. Mulch for Moisture Retention

A layer of mulch helps keep the soil moist longer, reducing the need for frequent watering.

🌵 Special Considerations: Indoor Plants vs. Outdoor Plants
Indoor Plants
  • Morning watering is ideal, but since they aren’t exposed to the sun and wind, you have more flexibility.
  • Use room-temperature water to avoid shocking the roots.
Outdoor Plants
  • Stick to the early morning rule, especially in summer.
  • During rainy seasons, adjust watering to prevent water-logging.
🌳 Seasonal Adjustments: Watering in Different Weather
Summer
  • Water more often, focusing on mornings.
  • Keep an eye on potted plants—they dry out faster.
Winter
  • Water less frequently, as plants’ growth slows down.
  • For indoor plants, maintain humidity rather than over watering.
Rainy Season
  • Hold off on watering unless the soil is completely dry.
  • Ensure proper drainage to prevent root rot.
🌺 Final Words: Syncing with Nature’s Schedule

Watering plants is an art that blends timing, technique, and intuition. By understanding When to Water Your Plants, you can create a thriving green space, whether it’s a lush garden or a cozy indoor jungle. The next time you reach for the watering can, do it with purpose—your plants will thank you with vibrant, healthy growth.

By following these assertive yet practical guidelines, you’ll not only save water but also nurture a garden that thrives through every season. Water wisely, and watch nature work its magic!

Ideal Time to Wake Up And Sleep: Mastering Your Body’s Natural Rhythm

Ideal Time to Wake Up And Sleep: Mastering Your Body’s Natural Rhythm

Getting the right amount of sleep is not just about counting hours—it’s about aligning your sleep schedule with your body’s natural rhythms. In a world obsessed with productivity hacks and wellness trends, understanding the ideal time to sleep and wake up can transform your daily life. It’s time to stop guessing and start mastering the art of sleep.

Why Your Sleep Schedule Matters

Your sleep schedule isn’t just a random habit; it’s a biological necessity. The human body operates on a circadian rhythm, an internal clock that dictates when you feel alert or tired. Disrupting this rhythm with inconsistent sleep patterns can lead to fatigue, decreased productivity, and even long-term health issues. Find below benefits of Ideal Time to Wake Up And Sleep.

A well-timed sleep schedule can:

  • Boost mental clarity and focus
  • Enhance mood and emotional stability
  • Improve physical health and recovery
  • Regulate metabolism and support weight management
The Science Behind the Ideal Sleep Time

The ideal time to sleep varies by individual but generally falls between 9 p.m. and 11 p.m. During this window, your body is primed to enter the first sleep cycle, allowing you to progress naturally through the essential stages of sleep: light, deep, and REM (Rapid Eye Movement).

Why This Window Works:
  • Melatonin Production: Your body starts releasing melatonin, the sleep hormone, as the sun sets. By 9 p.m., melatonin levels are optimal for initiating sleep.
  • Natural Cool down: Body temperature drops in the evening, promoting a state of drowsiness. Sleeping during this phase supports quicker sleep onset.
  • Recovery Mode: Early sleep maximizes deep sleep cycles, which are crucial for physical recovery, muscle repair, and immune function.
When to Wake Up for Maximum Productivity

Waking up between 5 a.m. and 7 a.m. aligns with the natural conclusion of your sleep cycle. During this time, melatonin production wanes, and cortisol levels rise, preparing your body for alertness and energy by managing Ideal Time to Wake Up And Sleep.

Early Morning Benefits:
  • Quiet Time: Fewer distractions in the early hours help enhance focus and productivity.
  • Better Mental Health: Exposure to early sunlight boosts serotonin, the ‘feel-good’ hormone, setting a positive tone for the day.
  • Consistent Routine: Waking up early encourages a disciplined lifestyle, reinforcing a healthy sleep pattern.
How to Set Your Ideal Sleep-Wake Cycle
  1. Calculate Your Sleep Needs: Adults generally require 7-9 hours of sleep. If you need to wake up at 6 a.m., aim to be asleep by 10 p.m.
  2. Establish a Wind-Down Routine: Prepare your body for sleep by dimming lights, avoiding screens, and engaging in calming activities like reading or meditation.
  3. Avoid Sleep Disruptors: Caffeine, heavy meals, and vigorous exercise close to bedtime can interfere with sleep onset and quality.
  4. Embrace Consistency: Stick to your schedule, even on weekends. Irregular sleep patterns confuse your circadian rhythm, making it harder to get quality rest.
What If You’re a Night Owl?

Not everyone is naturally wired to sleep early. If you find it challenging to fall asleep before midnight, gradually adjust your bedtime by 15-30 minutes every few days until you reach the desired sleep window. Consider lifestyle changes that promote earlier sleep, such as:

  • Limiting evening screen time
  • Creating a dim, cool, and quiet sleep environment
  • Using relaxation techniques to reduce nighttime alertness
The Consequences of Ignoring Your Body Clock

A misaligned sleep schedule doesn’t just make you groggy—it impacts nearly every aspect of your health. Chronic sleep deprivation or inconsistent sleep patterns can lead to:

  • Weakened immunity
  • Weight gain and metabolic issues
  • Increased risk of chronic diseases such as diabetes and heart disease
  • Mental health challenges, including anxiety and depression
Final Thoughts: Take Control of Your Sleep Schedule

The Ideal Time to Wake Up And Sleep is not a one-size-fits-all formula, but a guideline shaped by natural biological cues. By respecting your body’s circadian rhythm, you can optimize your health, productivity, and overall well-being.

Remember, good sleep is not a luxury—it’s a necessity. Commit to a consistent sleep schedule today, and watch how it transforms your life.

Exit mobile version