Bathroom Bliss: How to Organize Bathroom Like a Pro (and Make It Look Gorgeous!)

Bathroom Bliss: How to Organize Bathroom Like a Pro (and Make It Look Gorgeous!)🛁

A cluttered bathroom can turn your morning routine into a stressful experience. Imagine reaching for your favorite face wash and knocking over a cascade of bottles—annoying, right? The truth is, organizing your bathroom isn’t just about cleanliness; it’s about creating a serene, spa-like atmosphere that welcomes you every time you step in. Here’s how you can transform your bathroom into a well-organized, aesthetically pleasing space without breaking the bank.

🧼 1. Start with a Blank Slate: Declutter Like You Mean It!

While talking about How to Organize Bathroom, the first step to organizing any space is decluttering, and your bathroom is no exception. The more you hold onto half-used products and expired toiletries, the harder it becomes to achieve that clean, attractive look.

Decluttering Tips:
  • Empty Everything: Take out every item from your cabinets, shelves, and shower area.
  • Sort Ruthlessly: Group items into categories—keep, toss, donate. If you haven’t used a product in the last three months, it’s time to let it go.
  • Check Expiry Dates: Many beauty and skincare products have a shelf life. Toss anything that’s past its prime.

Pro Tip:

Use transparent bins or baskets while sorting. This not only keeps things organized but also allows you to see everything at a glance.

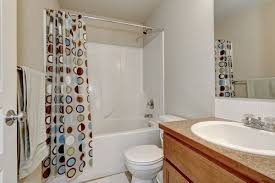
🚿 2. Maximize Storage Space: Smart Solutions for Small Bathrooms

Whether your bathroom is spacious or cozy, smart storage is key to maintaining order. Here are some creative ideas to make the most of every inch:

Use Vertical Space:

  • Install floating shelves above the toilet or next to the vanity for extra storage.
  • Hang towel racks or hooks on the back of the door to save cabinet space.

Drawer Dividers Are Your Best Friend:

  • Organize makeup, grooming tools, and smaller items with adjustable dividers. This keeps everything in place and prevents clutter.

Think Outside the Box:

  • Use a bar cart as a mobile storage unit. It can hold towels, toiletries, and even add a touch of elegance to your bathroom.
  • Add magnetic strips inside cabinet doors to hold metal grooming tools like tweezers and nail clippers.
🌿 3. Create a Designated Place for Everything

The secret to organize bathroom is ensuring that every item has a dedicated spot. This not only makes the space look tidy but also makes it easier to maintain.

Set Zones in Your Bathroom:

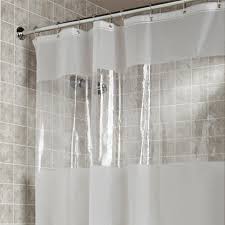
  • Shower Area: Only keep necessary items like shampoo, conditioner, and body wash. Use a corner caddy or a hanging organizer.
  • Vanity Zone: Use trays to keep your daily skincare and beauty products organized. Small jars can hold cotton pads, earbuds, and hair ties.
  • Under the Sink: Utilize stackable drawers or baskets to store cleaning supplies, extra toiletries, and backup products.

Labeling Works Wonders:

  • Invest in cute labels or a label maker to ensure everyone in the house knows where things belong.
🧴 4. Style Meets Function: Choose Attractive Storage Solutions

Organizing doesn’t mean sacrificing style. With the right storage solutions, you can keep your bathroom neat while enhancing its aesthetic appeal.

Baskets and Bins:
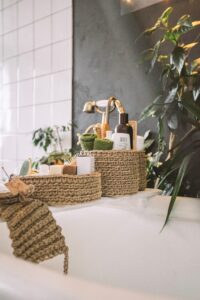
  • Opt for woven baskets or clear acrylic bins that match your bathroom’s decor. They keep things organized while looking chic.
Glass Jars and Containers:
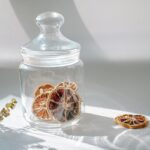
  • Use glass jars for bath salts, cotton balls, and soap bars. They add a spa-like feel to your bathroom.
Decorative Trays:
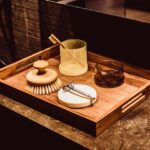
  • Place a decorative tray on your vanity to hold perfumes, lotions, and small accessories. It adds a polished look and keeps things tidy.
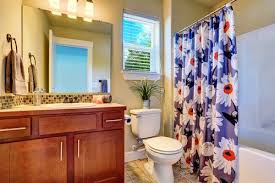
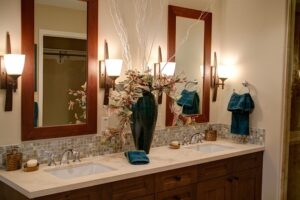
🕯️ 5. Add Finishing Touches: Make It Inviting

Once everything is organized, it’s time to add those finishing touches that elevate your bathroom’s ambiance.

Incorporate Greenery:

  • Add a small potted plant or a vase of fresh flowers. It brings a refreshing vibe and a pop of color.

Introduce Soft Textiles:

  • Use plush towels, a cozy bath mat, and soft robes to create a comforting atmosphere. Roll up extra towels and store them in a basket for a hotel-like feel.

Embrace Scent and Lighting:

  • Light a scented candle or use a diffuser with essential oils to make your bathroom smell heavenly.
  • Install soft lighting or add a small lamp to create a warm, relaxing glow.
💡 Bonus Tips: Maintaining Bathroom Organization Long-Term
  • Adopt a One-In, One-Out Rule: When you buy a new product, get rid of an old or unused one.
  • Quick Daily Reset: Spend a minute each day putting items back in their designated spots.
  • Weekly Clean-Up: Wipe down surfaces, empty the trash, and do a quick inventory check to avoid clutter buildup.

🚀 Your Dream Bathroom Awaits!

Organize bathroom attractively is not just about tidiness; it’s about creating a sanctuary where you can unwind and recharge. With smart storage solutions, a touch of style, and a commitment to maintaining order, you can turn even the smallest bathroom into a beautiful, functional space by these Organize Bathroom Tips.

So, roll up your sleeves, start decluttering, and transform your bathroom into the blissful retreat you deserve!


Eliminate Ink Stains from Clothes Like a Pro – No Excuses!

Eliminate Ink Stains from Clothes Like a Pro – No Excuses!

Ink stains are relentless. One careless moment with a pen can ruin an expensive shirt, a favorite dress, or your go-to pair of jeans. But here’s the truth—most ink stains are completely removable if you act fast and use the right techniques. No more excuses. Stop tossing stained clothes into the bin or hiding them in the back of your closet. Follow these foolproof methods, and take control of ink stains like a pro.

Know Your Enemy: The Different Types of Ink

Not all ink stains are created equal. Some inks are water-based and easy to remove, while others are oil-based or permanent, making them much tougher. For Eliminate Ink Stains from Clothes Like a Pro & Before attacking the stain, identify the type of ink you’re dealing with:

  • Ballpoint Pen Ink: Thick, oil-based, and resistant to water. Requires alcohol-based removers.
  • Gel Ink: More stubborn than ballpoint ink because it’s highly pigmented and designed to be smear-resistant.
  • Fountain Pen Ink: Water-based and easier to remove but can spread quickly if not handled properly.
  • Permanent Marker Ink: The toughest of all, as it’s designed to stay put. Requires strong solvents like acetone or bleach.

Now that you understand the stain type, let’s move on to elimination.

Step 1: Act Immediately – Waiting Is Your Worst Enemy

Ink sets fast, and the longer it sits, the harder it becomes to remove. The moment you notice an ink stain, drop everything and start treating it. Don’t rub it—rubbing spreads the stain and pushes the ink deeper into the fabric. Instead, blot it gently with a paper towel or cloth to absorb as much ink as possible.

Step 2: Choose the Right Ink-Fighting Weapon

Different fabrics and ink types need different treatment methods for Eliminate Ink Stains from Clothes Like a Pro. Here’s what works best:

For Cotton, Polyester, and Blended Fabrics

Rubbing Alcohol or Hand Sanitizer – The Ultimate Ink Fighter

  1. Place a clean cloth under the stained area to prevent ink from spreading.
  2. Soak a cotton ball or paper towel with rubbing alcohol (or clear hand sanitizer) and dab the stain.
  3. Continue blotting until the ink lifts.
  4. Rinse with cold water and wash the garment immediately.

Milk – The Gentle Yet Powerful Remedy

  1. Pour whole milk into a bowl and soak the stained fabric overnight.
  2. The milk will break down the ink and lift it from the fibers.
  3. Wash the garment in warm water the next morning.

For Delicate Fabrics (Silk, Wool, or Rayon)

White Vinegar and Dish Soap – The Gentle Duo

  1. Mix one tablespoon of white vinegar with a teaspoon of liquid dish soap and warm water.
  2. Dab the solution onto the stain using a soft cloth.
  3. Let it sit for 15 minutes, then rinse with cold water.

Hairspray – Yes, It Still Works!

  1. Choose an alcohol-based hairspray (not a modern oil-based one).
  2. Spray directly on the stain and let it sit for a minute.
  3. Blot with a clean cloth and rinse with cold water.

For Denim and Tough Fabrics

Acetone (Nail Polish Remover) – The Heavy-Duty Solution

  1. Soak a cotton ball in pure acetone (not the diluted version with oils).
  2. Dab the stain repeatedly, watching it break down.
  3. Rinse thoroughly and wash immediately.

Baking Soda and Water Paste

  1. Mix baking soda with a few drops of water to create a paste.
  2. Gently scrub the stain using an old toothbrush.
  3. Rinse and wash normally.

Step 3: Wash It Right – No Shortcuts

Once the stain is mostly gone, launder the garment as you normally would. BUT—before tossing it in the dryer, check if the stain is completely gone. Heat sets stains permanently, so if you still see ink, repeat the treatment before drying.

Bonus: Removing Dried or Old Ink Stains

If you’ve already let an ink stain dry, it’s not over yet. Try this:

  1. Dab with glycerin to loosen the ink.
  2. Apply rubbing alcohol or hydrogen peroxide and let it sit for 10 minutes.
  3. Scrub with a toothbrush and wash immediately.

Prevention Tips: Stop the Ink Stains Before They Happen

✔ Always check your pockets before throwing clothes in the washer—pens explode in the wash!
✔ Store pens with caps securely closed to avoid accidental leaks.
Use stain-resistant sprays on delicate fabrics to create a protective layer.

Final Words: Take Control of Ink Stains – No More Excuses!

Ink stains may be annoying, but they are not permanent if you take action. The key is speed, the right remover, and patience. Whether you use alcohol, vinegar, milk, or even hairspray, you now have the knowledge to Eliminate Ink Stains from Clothes Like a Pro. So next time ink strikes—fight back and win!

You may also like to read…

How to Achieve an Instant Glow on Your Face Using Simple Home Remedies?

How to Achieve an Instant Glow on Your Face Using Simple Home Remedies?

Radiant, glowing skin doesn’t need to be complicated or expensive. Achieving an instant glow can be as simple as turning to natural ingredients in your kitchen. These home remedies not only bring out your skin’s natural luminosity but also work to enhance its health over time. Whether you’re preparing for an event or simply want a quick glow-up, these remedies are your key to healthy, glowing skin that shines with vitality.

  1. Honey and Lemon: A Power Duo for Glowing Skin

For an Instant Glow on Your Face, honey and lemon can make a noticeable difference. Honey is a powerhouse of antioxidants, known for its ability to hydrate and nourish the skin. Its moisturizing properties lock in moisture, leaving your skin soft and glowing. Lemon, rich in vitamin C, is a natural brightening agent that helps even out skin tone and fight dullness.

How to Use:

  • Mix one tablespoon of raw honey with the juice of half a fresh lemon.
  • Apply it evenly to your face, avoiding the eye area.
  • Leave it on for 15 minutes before rinsing with warm water.

This mixture provides immediate hydration and brightens the skin, leaving you with a fresh, dewy glow.

  1. Aloe Vera and Turmeric: Soothe and Illuminate Your Skin

Aloe Vera is a calming and hydrating agent, making it an excellent choice for skin that needs a little TLC. Turmeric, on the other hand, has long been known for its brightening and anti-inflammatory properties. Together, these ingredients create a mask that not only soothes but also works wonders in enhancing your skin’s natural glow.

How to Use:

  • Take one tablespoon of aloe Vera gel (preferably fresh) and add a pinch of turmeric powder.
  • Mix until the paste is smooth, then apply it evenly across your face.
  • Leave it on for 15-20 minutes before washing off with lukewarm water.

The combination of aloe Vera and turmeric boosts skin clarity and imparts an instant glow by evening out skin tone and reducing any redness or irritation.

  1. Untitled design – 1

    Cucumber and Rose Water: A Refreshing Glow-Up

Cucumber has a cooling effect on the skin, making it perfect for soothing and rehydrating. It helps in reducing puffiness and dark circles, especially around the eyes. Rose water, a natural astringent, balances the skin’s oil production, tightens pores, and provides a refreshing lift. Together, they work synergistically to hydrate and rejuvenate, giving your face an immediate refreshed glow.

How to Use:

  • Extract the juice from half a cucumber and mix it with two tablespoons of pure rose water.
  • Apply this mixture to your face with a cotton pad.
  • Leave it on for 10-15 minutes, then rinse with cool water.

This remedy not only gives your skin a burst of hydration but also revitalizes your complexion, offering an instant glow with a refreshed feel.

  1. Gram Flour and Yogurt: Exfoliate for Smooth, Glowing Skin

Exfoliation is a critical step in achieving radiant skin. Gram flour (bean) serves as a natural exfoliate, while yogurt, packed with lactic acid, helps break down dead skin cells and reveal a fresher, more youthful layer. This scrub also balances the skin’s oil production, ensuring it doesn’t look too dry or too oily, leaving it soft, smooth, and glowing.

How to Use:

  • Mix two tablespoons of gram flour with one tablespoon of yogurt to form a paste.
  • Apply the mixture evenly on your face and massage in circular motions for 2-3 minutes.
  • Leave it on for another 5-10 minutes, then rinse with lukewarm water. It will add Instant Glow on Your Face.

The exfoliating effect, combined with yogurt’s hydration, will not only remove dead skin but also brighten your complexion instantly.

  1. Papaya and Honey: A Vitamin C Boost for Luminous Skin

Papaya is often used in skin care for its enzyme, papain, which helps break down dead skin cells and promotes skin renewal. Rich in vitamin C, papaya also acts as a natural lightener, reducing dark spots and discoloration. When paired with honey, it boosts hydration and nourishment, resulting in glowing, healthy skin.

How to Use:

  • Mash a small piece of ripe papaya and mix it with one teaspoon of honey.
  • Apply it evenly to your face and leave it on for 10-15 minutes.
  • Wash it off with warm water.

The result is glowing, nourished skin that feels smooth and hydrated.

  1. Olive Oil and Sugar Scrub: Deep Moisture and Smoothness

Olive oil is a luxurious moisturizer, packed with antioxidants that protect and nourish the skin. Sugar, when used as an exfoliate, gently sloughs off dead skin cells to reveal smooth, fresh skin. Together, this combination hydrates while providing deep exfoliation, making your skin glow from within.

How to Use:

  • Mix one tablespoon of olive oil with one tablespoon of sugar.
  • Massage the mixture onto your face in circular motions for 2-3 minutes.
  • Rinse thoroughly with lukewarm water for Instant Glow on Your Face.

The sugar exfoliates while the olive oil hydrates, leaving your skin soft, smooth, and glowing immediately.

  1. Milk and Saffron: The Ancient Secret to Bright and Glowing Skin

Milk is a gentle exfoliate due to the lactic acid it contains, while saffron has been prized for centuries for its ability to brighten the skin and improve skin texture. Saffron also helps lighten hyperpigmentation, making your skin look more even-toned and radiant.

How to Use:

  • Soak a few strands of saffron in 2 tablespoons of milk for about 10 minutes.
  • Apply this mixture to your face using a cotton pad.
  • Let it sit for 15-20 minutes, then rinse with cool water.

This luxurious remedy will immediately leave your skin brighter and visibly glowing, giving it a smooth, clear complexion.

  1. Lemon and Baking Soda: Brightening and Deep Cleaning

Lemon and baking soda together act as a potent combination to brighten and cleanse the skin which Instant Glow on Your Face. Lemon works as a natural bleaching agent, while baking soda exfoliates and removes deep-seated dirt. This scrub cleanses and brightens your skin instantly, leaving it fresh and glowing.

How to Use:

  • Mix half a teaspoon of baking soda with the juice of half a lemon.
  • Apply this paste gently to your face and massage for a minute.
  • Wash it off with lukewarm water.

This scrub, when used sparingly, cleanses the skin and brightens it instantly, but be cautious if you have sensitive skin, as baking soda can be abrasive.

  1. Turmeric and Coconut Oil: Nourishment and Glow

Turmeric is a well-known anti-inflammatory and brightening agent, and coconut oil, being rich in fatty acids, deeply nourishes the skin. This combination works to reduce dullness and restore natural radiance, leaving the skin looking plump, soft, and glowing.

How to Use:

  • Mix a pinch of turmeric with one tablespoon of coconut oil to form a paste.
  • Apply this paste to your face and leave it on for 15 minutes.
  • Rinse it off with lukewarm water.

This remedy not only provides instant glow but also nourishes and repairs the skin, giving it a radiant, youthful appearance.

Final Thoughts: Glow Naturally with Simple Ingredients

You don’t need to rely on expensive beauty treatments or harsh chemicals to achieve glowing skin & to add  Instant Glow on Your Face. The natural ingredients in your kitchen can do wonders for your skin, giving it the hydration, nourishment, and exfoliation it needs for an instant glow. From honey and lemon to turmeric and coconut oil, these home- remedies are not just effective—they’re simple and kind to your skin.

Regularly using these natural treatments will not only give you an immediate glow but will also contribute to your skin’s long-term health and vitality. Remember, the key to glowing skin is consistency, hydration, and nourishment. So, pamper your skin naturally and watch it shine with a fresh, radiant Instant Glow on Your Face.

How to Defeat Boredom While Traveling: Plane, Train, or Bus

How to Defeat Boredom While Traveling: Plane, Train, or Bus

Long journeys often test our patience. Whether you’re squeezed into an airplane seat, rocking through endless train tracks, or stuck on a slow-moving bus, time seems to crawl at an excruciating pace. The temptation to scroll mindlessly through your phone or stare blankly at the seat ahead can be overwhelming. But why waste precious hours? Instead, turn that travel time into an opportunity for fun, learning, and relaxation.

Here’s how to conquer boredom and make your travel experience not just bearable, but enjoyable.

  1. Command Your Attention: Watch, Listen, Absorb

Why let the journey control you when you can take charge of your time? Entertainment is your best friend when trapped in a confined space.

Curate Your Watchlist in Advance

The worst mistake travelers make? Relying on in-flight entertainment or weak Wi-Fi. Download movies, documentaries, or your favorite shows beforehand. A gripping film or a binge-worthy series will shrink those travel hours into minutes.

Plug Into a Different World with Audio

If staring at a screen feels exhausting, let words paint the pictures instead. Whether it’s a deep-dive podcast into unsolved mysteries, an inspiring TED Talk, or an audiobook that transports you to another world—audio content allows you to relax while stimulating your mind.

Create a Soundtrack for Your Journey

Music isn’t just background noise; it’s a mood transformer. A well-curated playlist can make a bus ride feel like an adventure, a flight feels like a dream, or a train journey feel cinematic. Set the mood—your trip is the main event.

  1. Dominate Your Time: Productivity on the Move

Boredom is wasted time. Productivity is power. Transform your trip into a launchpad for growth and creativity.

Read & Expand Your Perspective

When was the last time you sat down and truly read? Not skimmed, not scrolled—read. A book, an article, or an insightful essay can engage your mind far better than aimless phone browsing. Don’t carry books? Load up your Kindle or phone with digital reads before departure.

Write, Journal, Reflect

Whether you’re capturing thoughts, travel experiences, business ideas, or personal goals, writing is a powerful exercise for the mind. Keep a journal, type on your phone, or even sketch out plans in a notebook. Your future self will thank you for the ideas you documented.

Organize Your Life on the Go

Clean your phone storage, sort through your emails, update your calendar, or outline a project. A few simple tasks can make you feel more in control—and by the time you arrive, you’ll have already accomplished something.

  1. Engage Your Brain: Play, Solve, Compete

Who says fun is only for kids? Games keep the mind active and entertained.

Challenge Yourself with Mental Games

Sudoku, crossword puzzles, chess, logic riddles—engaging in brain games sharpens your thinking and passes time effortlessly. Download a few puzzle apps, carry a Sudoku book, or challenge yourself with memory exercises.

Offline-Friendly Mobile Games

Don’t rely on the internet; download offline games that challenge your reaction speed, strategic thinking, or creativity. Whether it’s a word game, an adventure quest, or a trivia challenge, a good game can turn a boring trip into an exciting competition.

Classic Card & Travel Games

If traveling with a companion, bring a deck of cards or a compact board game. A few rounds of cards can make time fly—and even spark conversations with fellow travelers.

  1. Turn Strangers into Stories: Socialize & Observe

Strike Up a Conversation

It’s easy to ignore the people around you, but every traveler has a story. If the opportunity arises, talk to the person next to you. You might meet a seasoned traveler with incredible tales, a local who knows hidden gems, or someone with insights that shift your perspective.

The Art of People-Watching

Not all conversations need words. Observe. Watch how people interact, how they dress, how they express themselves. A train station or airport is a window into different cultures, personalities, and human behavior’s—a live documentary playing out in front of you.

  1. Reset Your Mind & Body: Rest, Reflect, Recharge

Breathe & Meditate

Travel stress is real. Long security lines, cramped seats, delays—it’s all frustrating. But instead of letting stress consume you, take control through mindfulness. Close your eyes, breathe deeply, and let the noise fade. A few minutes of meditation can reset your mind and leave you feeling refreshed.

Sleep Smart, Not Just Long

Power naps are underrated. If you’re traveling overnight or across time zones, strategic sleep can make a huge difference. Use noise-cancelling headphones, an eye mask, and a neck pillow to maximize comfort. A well-timed nap can leave you energized instead of groggy.

Stretch & Move

Sitting for long hours isn’t just uncomfortable—it’s unhealthy. Move your legs, stretch your back, roll your shoulders. On a plane, walk down the aisle when possible. On a train or bus, adjust your posture frequently. Your body will thank you.

Final Thought: Take Control of Your Journey

Boredom is not an enemy—it’s an invitation to create, experience, and grow. The next time you find yourself stuck on a plane, train, or bus, remember this: you control your time, your mind, and your experience.

Will you let boredom waste your journey, or will you transform it into something memorable?

How to Grow Tulips in a Bucket: A Comprehensive Guide

How to Grow Tulips in a Bucket: A Comprehensive Guide

Tulips are an iconic symbol of spring, admired for their graceful petals and a wide spectrum of colors. If you don’t have a garden or ample outdoor space but still want to enjoy their beauty, growing tulips in a bucket is the perfect solution. A well-maintained bucket can mimic the natural environment for these flowers, allowing them to thrive and flourish. Here’s an assertive, step-by-step guide to successfully grow tulips in a bucket, ensuring a beautiful and vibrant display.

Why Grow Tulips in a Bucket?

Growing tulips in a bucket offers several advantages. It provides you with the flexibility to place them wherever you desire—whether it’s on a balcony, patio, or even inside your home. Additionally, buckets allow you to control the growing conditions more effectively than planting in the ground. It’s an ideal method for those with limited garden space or those living in apartments. You can even move the bucket around to adjust sunlight exposure or bring the tulips indoors for an eye-catching display when they bloom.

Choosing the Right Bucket

The first step to successfully growing tulips in a bucket is selecting the right container. Not just any bucket will do. The key requirements for a bucket are:

  • Size: Choose a bucket that’s at least 8–10 inches deep, allowing sufficient space for the tulip bulbs to grow and develop their roots. A 12-inch diameter will allow room for multiple bulbs, but remember, tulips need space to expand.
  • Drainage: Ensure the bucket has drainage holes. Without proper drainage, water will accumulate, causing the bulbs to rot. If your bucket doesn’t have holes, you can drill a few yourself.
  • Material: Plastic or ceramic buckets work best as they hold moisture well while allowing some airflow. Avoid overly porous materials that can dry out the soil quickly.

Selecting Tulip Bulbs

The next critical step is selecting healthy tulip bulbs. The success of your tulip-growing endeavor largely depends on the quality of the bulbs you start with. Here’s how to choose the best:

  • Size and firmness: Choose bulbs that are large, firm, and free from any mild or damage. The larger the bulb, the more likely it will produce bigger, more vibrant flowers.
  • Variety: There are hundreds of varieties of tulips, so select the one that suits your space. If you are growing tulips in a bucket, opt for early-blooming varieties or dwarf species like Tulip kaufmanniana or Tulip fosteriana, which are better suited for containers.

Preparing the Bucket and Soil

Before planting your tulip bulbs, you need to prepare the bucket and soil properly to provide the right environment for the bulbs to thrive.

  • Soil: Use well-draining potting soil for tulips. A mix that contains peat moss, perlite, and compost is perfect for container planting. Avoid garden soil, as it can become compacted in containers, leading to poor drainage.
  • Layering: Start by placing a layer of small stones or broken pottery pieces at the bottom of the bucket to ensure water drains freely. Add soil on top, filling about two-thirds of the bucket. Ensure the soil is loose and not packed too tightly to allow good root development.

Planting the Bulbs

Now that you have prepared the bucket and soil, it’s time to plant the tulip bulbs. Follow these steps carefully to ensure proper bulb placement:

  1. Depth: Dig holes in the soil that are roughly two to three times the height of the bulbs. For example, if your tulip bulb is 2 inches tall, plant it at a depth of about 4 to 6 inches.
  2. Spacing: Space the bulbs about 2–3 inches apart. You can plant them in a circular pattern or place them in rows, depending on your preference. Crowding bulbs can result in smaller flowers or poor growth.
  3. Positioning: Place the bulbs with the pointed end facing upward. This ensures that the shoots grow toward the light when they emerge.
  4. Cover and Water: Once all the bulbs are planted, cover them with soil, ensuring the tips of the bulbs are fully covered. Water the soil thoroughly, but ensure there is no standing water at the bottom of the bucket.

Caring for Your Tulips

Tulips require a specific care regimen to thrive, especially when grown in a container. Here are some essential care tips to follow:

  • Watering: Tulips like moisture but don’t do well in waterlogged soil. Water the bulbs thoroughly after planting, and then maintain consistent moisture levels without allowing the soil to dry out completely. Check the soil regularly and water when the top inch feels dry.
  • Sunlight: Place your bucket in a location that receives at least 4-6 hours of direct sunlight per day. Tulips need plenty of light to bloom beautifully. If growing indoors, a south-facing window is ideal.
  • Temperature: Tulips need a period of cold dormancy to bloom. In regions with mild winters, you may need to refrigerate the bulbs for 6–8 weeks before planting. For colder climates, outdoor planting in buckets may naturally provide the required chill.
  • Fertilization: Apply a balanced, slow-release fertilizer in early spring when the tulips start growing. This provides the necessary nutrients for healthy growth and blooming.

Dealing with Challenges

While tulips are relatively easy to grow, certain challenges can arise when growing them in a bucket:

  • Pests: Watch for pests such as aphids or slugs, which can damage the flowers. Use natural insecticides or gently wash the plants with a mild soap solution.
  • Root Rot: Ensure that your bucket has proper drainage, and avoid over-watering. Root rot can be a major problem if the soil remains too wet.
  • Flowering Issues: If your tulips fail to bloom, it could be due to insufficient sunlight or improper chilling. Ensure the bulbs have received enough cold treatment (if necessary) and adjust their sunlight exposure accordingly.

Enjoying Your Blooms

Tulips typically bloom in early to mid-spring, depending on the variety and your climate. Once your tulips start to flower, you’ll be rewarded with stunning blooms that can brighten up any space. Be sure to regularly remove spent flowers to encourage healthy growth and prevent the plant from focusing energy on seed production.

Once the flowers have finished blooming, allow the foliage to die back naturally. Do not cut the leaves off prematurely as they are still photosynthesizing and providing nutrients to the bulb for next year’s growth.

Growing tulips in a bucket is an excellent way to enjoy the beauty of these flowers without the need for a traditional garden. By following the steps outlined in this guide—choosing the right bucket, soil, and bulbs, and providing the necessary care and attention—you can cultivate a thriving tulip garden in any space. With patience and attention, you’ll have a stunning display of tulips to enjoy year after year, right at your doorstep.

How to Install Curtain Rods in Your Bathroom: A Complete and Assertive Guide

How to Install Curtain Rods in Your Bathroom: A Complete and Assertive Guide:

Installing curtain rods in your bathroom is not just a functional improvement—it’s a way to elevate the entire look of the space. Whether you’re installing a shower curtain for added privacy or using a decorative curtain to create a specific atmosphere, the process is straightforward if you know what you’re doing. Follow this comprehensive and detailed guide to install your curtain rod with precision and confidence.

Step 1: Select the Right Curtain Rod

Before you get started, you need to choose the correct curtain rod for your bathroom. Don’t rush this decision—your curtain rod will influence both the look and functionality of your space.

Shower Rods vs. Decorative Curtain Rods

If you’re hanging a shower curtain, you’ll need a shower rod, either straight or curved, depending on your preference. A curved rod will give you extra space inside the shower, which can be particularly useful in smaller bathrooms. A straight rod is a classic choice for most bathtubs and shower enclosures.

If you want to add some elegance to your bathroom, a decorative curtain rod is a great option. These rods can enhance your bathroom’s style, especially if you plan to hang curtains around a window or a tub area.

Step 2: Measure the Right Placement

Accurate measurements are critical when installing your curtain rod. Improper placement can lead to uneven curtains, gaps, or a cluttered appearance.

Height

Measure about 6–12 inches above the shower or bathtub to mount your rod. This ensures that the curtain hangs properly and covers the entire space. If you’re using the curtain for decorative purposes around a window, consider hanging the rod at least 4 inches above the window frame to create the illusion of taller ceilings.

Width

For a shower curtain rod, make sure the rod extends beyond the edges of the shower or bathtub by at least 2–4 inches on both sides. This extra width ensures that the curtain fully covers the shower or tub area when pulled across.

Step 3: Gather Your Tools and Materials

Before you start drilling, make sure you have all the necessary tools on hand. You don’t want to get halfway through and realize you’re missing something important.

Tools You’ll Need:

  • Drill: A power drill is essential for drilling holes in the wall.
  • Screwdriver: You’ll need this to tighten the screws into place.
  • Level: This ensures that your curtain rod is straight, avoiding a lopsided appearance.
  • Pencil or Marker: For marking the drilling spots accurately.
  • Measuring Tape: To ensure proper placement and distance.
  • Ladder or Step Stool: This is crucial if you’re working at a height, like above a tub or shower.

Materials to Have:

  • Curtain Rod: Choose one that fits the width of your shower or window.
  • Brackets: These will hold the rod in place.
  • Screws: Ensure you use screws that are appropriate for your wall type.
  • Wall Anchors: If you’re drilling into drywall or plaster, use anchors to ensure the screws stay securely in place.

Step 4: Mark the Drill Spots

Now it’s time to do the prep work. Using a pencil or marker, mark the spots where the brackets will be placed. These should be at the height and width that you measured earlier. For a shower curtain rod, ensure that the marks align evenly across both sides of the shower or tub.

Use a level to check that your markings are straight. A crooked curtain rod will make the bathroom look unprofessional and may cause the curtain to hang unevenly. Double-check your measurements and make any necessary adjustments.

Step 5: Drill the Holes

Before you drill, make sure you know what type of wall you’re working with—drywall, tile, or another material—because different walls require different types of anchors and drill bits.

For Drywall or Plaster:

  • Use a drill with the appropriate bit for the size of your wall anchors.
  • Drill the holes at the marked spots, making sure the holes are deep enough for the wall anchors.
  • Insert the wall anchors into the holes.

For Tile or Stone:

  • Use a masonry drill bit to create small pilot holes in the tile.
  • Make sure to drill slowly to avoid cracking the tile.

Step 6: Install the Brackets

Now that the holes are drilled and the wall anchors (if needed) are in place, it’s time to install the brackets that will hold your curtain rod.

Position each bracket at the drilled spots and use a screwdriver to insert the screws, securing them into place. Make sure each bracket is level and aligned before tightening the screws completely.

Step 7: Attach the Curtain Rod

Once the brackets are securely in place, slide the curtain rod onto the brackets. Ensure that the rod is properly seated in each bracket so that it doesn’t fall or slide out.

If you’re using a shower curtain rod, you may need to install the curtain rings or hooks at this point. Attach the curtain rings to the rod before you hang your curtain.

Step 8: Hang the Curtain

Finally, hang your curtain on the rod. Adjust the curtain so that it drapes evenly and covers the desired area. If you’re using a shower curtain, make sure the bottom of the curtain touches the floor or tub, depending on your design preference.

Final Thoughts

Installing curtain rods in your bathroom may seem like a minor task, but when done correctly, it can make a significant impact on both the functionality and aesthetic of your space. By following these steps with care and attention to detail, you’ll ensure that your curtain rods are mounted securely and look great. Don’t rush through the process—take your time to measure carefully and choose the right materials for a polished finish.

Now, sit back and admire your hard work—your bathroom will feel brand new with this simple yet impactful update!

Exit mobile version